- 01
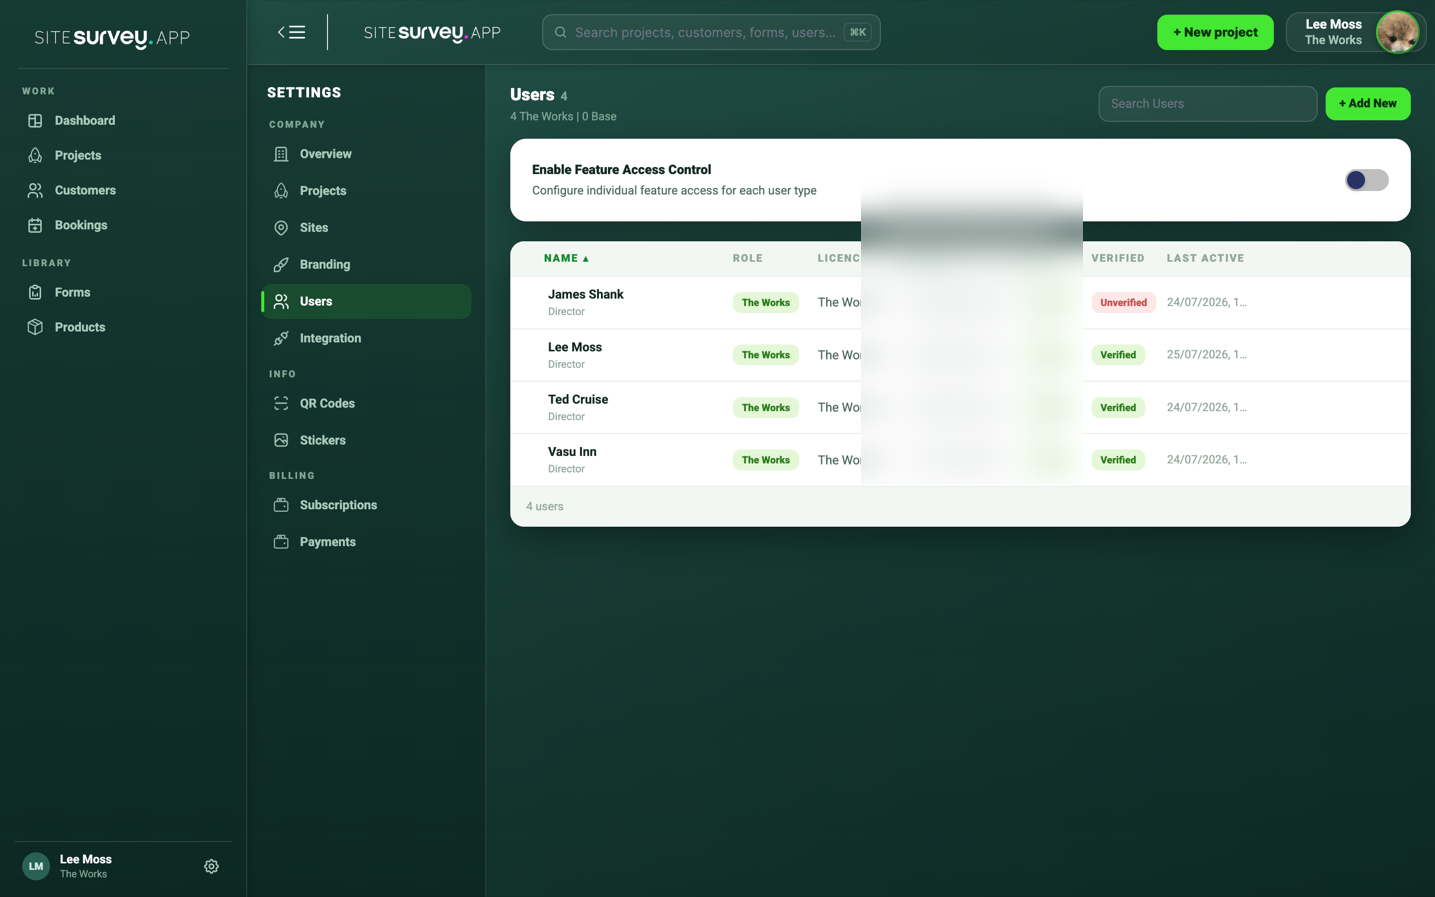
Open the Users settings
Go to Settings and choose Users. The page lists your team members along with the user type and licence each one holds.
- 02
Review the built-in user types
SiteSurvey provides two standard user types: Base and The Works. Each comes with a default set of features it can access.
- 03
Enable Feature Access Control
Switch on Enable Feature Access Control on the Users page. This reveals the controls for configuring individual feature access for each user type.
- 04
Edit the permission matrix
Use Select User Type to pick a type, then toggle features on or off. Web Dashboard options include Dashboard, Projects, Products, Workflows, Customers, Settings, Live Map and Calendars, with separate Mobile options such as Projects, QR Code, Bookings and Support Chat. Choose Save Permissions to apply the changes.
- 05
Create a custom user type
Choose Add Custom User Type, give it a name your team will recognise and select its License Type, either Base or The Works. The new type appears in the user type list with its own feature toggles.
- 06
Assign a user type to a team member
Choose the user type when you invite a new team member or edit an existing one. Every member with that type then gets the access you configured for it.
Good to know
- ✓Permission changes apply to the whole user type, so every member with that type is affected at once.
- ✓If you delete a custom user type, its members are automatically reassigned to the standard type for the same licence.
- ✓Name custom types after the job they represent, such as Senior Engineer, so they are easy to pick when inviting.
Was this guide helpful?
Your feedback helps us improve support content.