- 01
Open Project settings
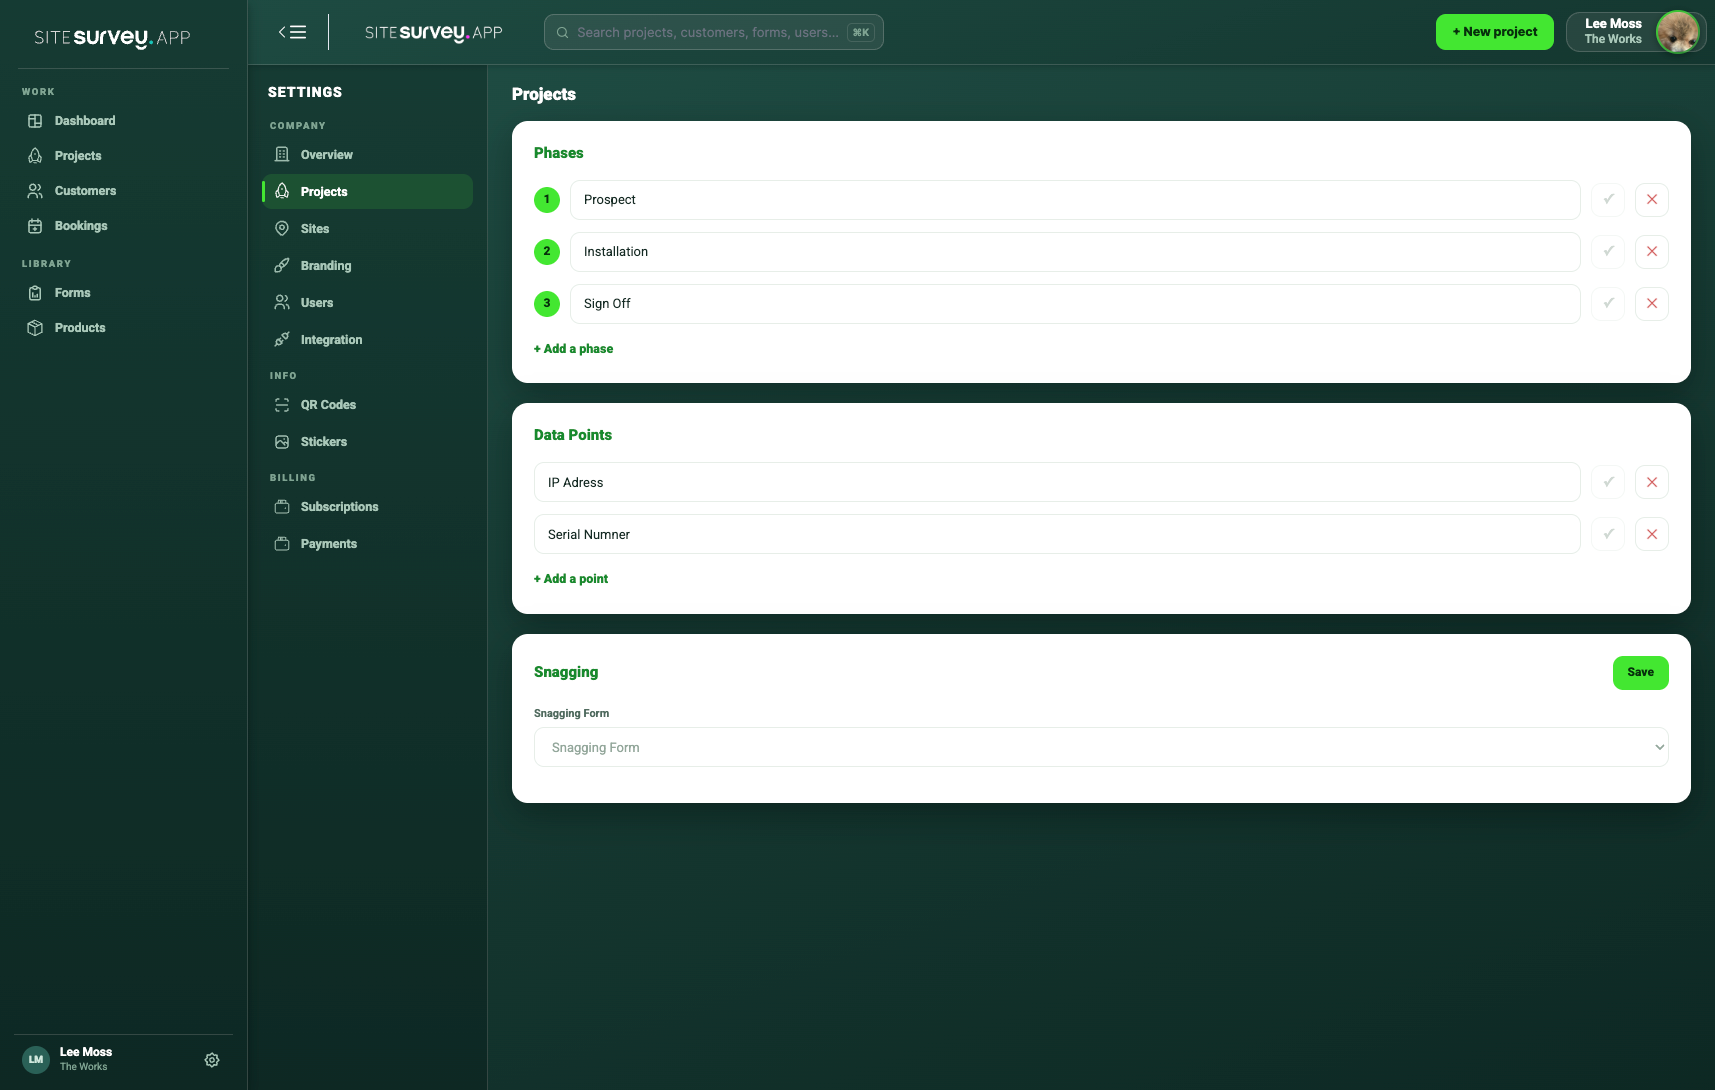
Open Settings and choose Projects under Company. The Data Points panel sits below the workspace phase settings.
- 02
Review existing fields
Check the current list before adding another field so the team does not end up with duplicate names for the same information.
- 03
Add a data point
Select Add a point and enter a precise label such as IP Address, MAC Address, Serial Number, Firmware Version or Test Result.
- 04
Confirm the new field
Use the confirmation control beside the field, then save the page if prompted. Reload the settings to verify that it has been retained.
- 05
Use it on products
Open a product in the correct project space and complete the relevant data points alongside forms, notes and photographs.
- 06
Review before deleting
Before removing a data point, check whether it is already used by live products, reports or connected Excel BOQs.
Good to know
- ✓Agree naming and formatting conventions before field work starts.
- ✓Use one clear field for each value rather than combining several identifiers.
- ✓Site-specific values belong on the project product record, not the reusable library template.
Was this guide helpful?
Your feedback helps us improve support content.