- 01
Configure the label layout
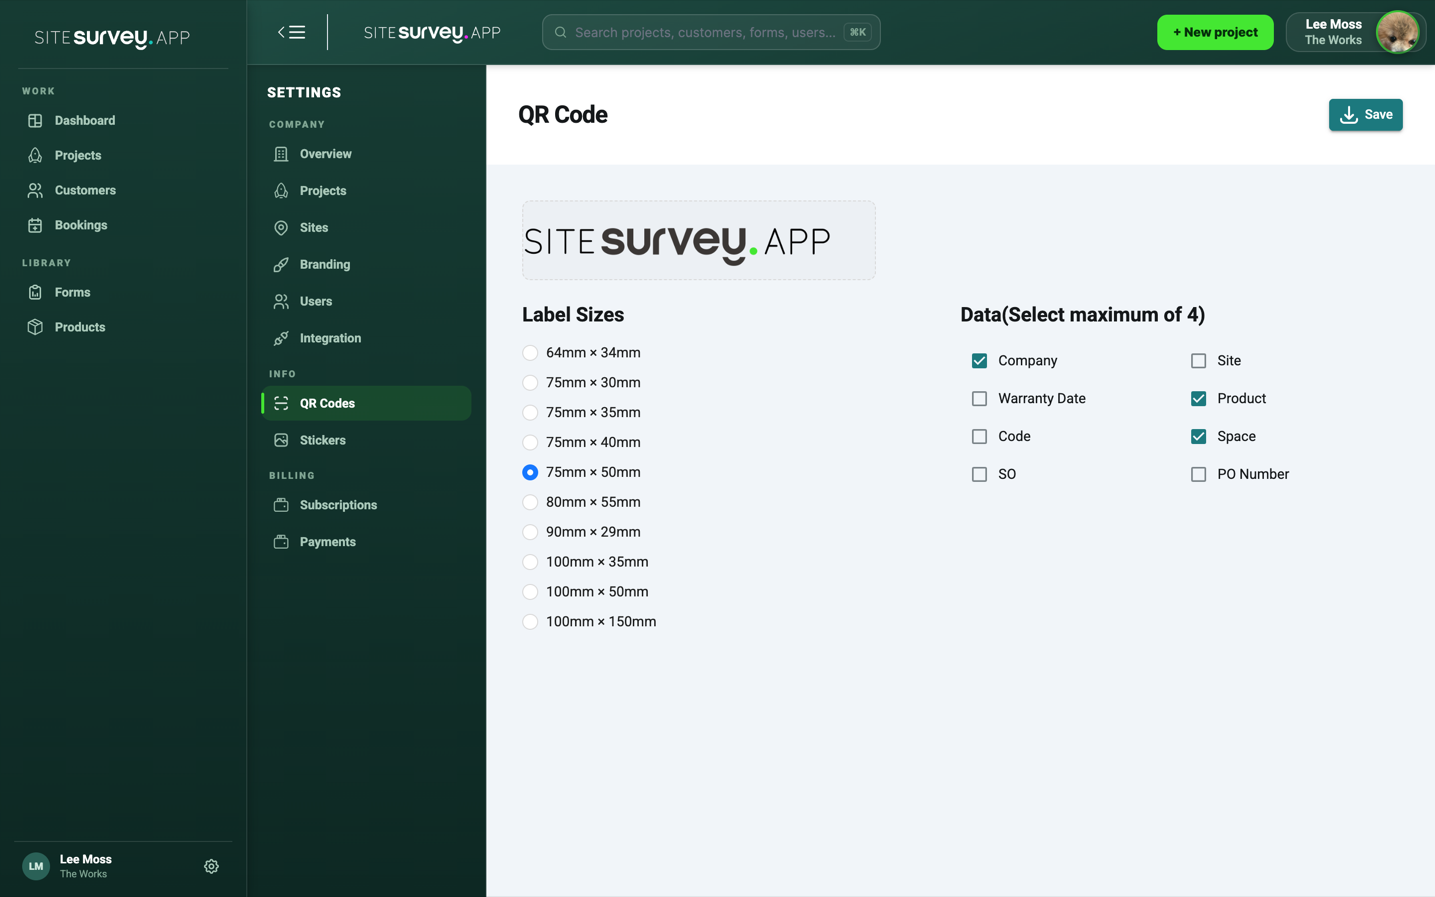
Go to Settings > Company > QR Code. Upload the logo to print on labels (350 × 75 pixels, under 2 MB), choose the label size that matches your printer stock and tick up to four data fields such as Space, SO, PO Number, Company and Site, then save.
- 02
Select the products
Open the project and go to the Products tab. Tick every product that needs a label.
- 03
Generate the labels
Select Print QR to download a PDF with one label per product at your configured size. This also registers the product's scan form, so the mobile app knows what to capture when the label is scanned.
- 04
Print and apply the labels
Print the PDF on label stock that matches the configured size, and stick a label on each product or its packaging before it reaches site. Teams with a Zebra label printer can send labels straight to it from the products table.
- 05
Scan the labels on site
In the mobile app, open the QR Scan tab and point the camera at a label—the product opens straight away, already linked to its project, site and space. You can also choose a space first and scan several products to assign them in one go, then scan vendor barcodes such as serial numbers, MAC and IP addresses into the product's data points.
Good to know
- ✓Print a single test label after changing the size or data fields to check everything fits before a full run.
- ✓The Stickers page in Settings holds reusable images for annotating floor plans—it is not related to QR labels.
Was this guide helpful?
Your feedback helps us improve support content.