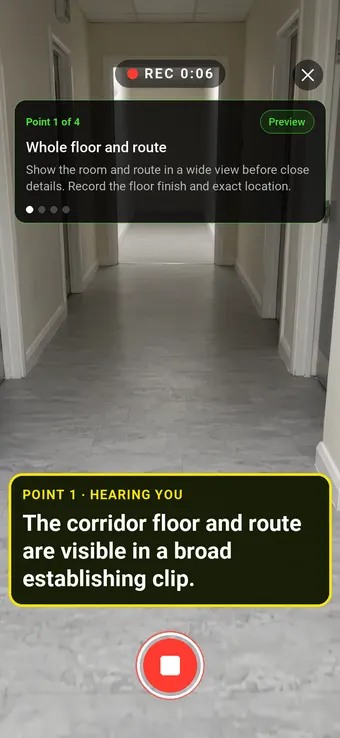
Hold to record. Keep holding while you film and speak; release to save the clip and its transcribed answer.
Four 9:16 example clips generated in Google Flow. Fictional inspection; no customer site is shown.
App-style example using Google Flow footage. The animated recording interface and gradually appearing words are scripted; no real inspection or live transcription took place.
The full visual example
Watch all four inspection points.
Each short clip shows one point in the guided route. The footage is AI-generated and the observations are scripted examples, not findings from a real inspection.
POINT 01
Whole floor and route
Show the room and route in a wide view before close details. Record the floor finish and exact location.
The corridor floor and route are visible in a broad establishing clip.
POINT 02
Finish seam or joint
Film the accessible seam from two angles, keeping adjoining sound finish in the frame. Do not pull up the material.
An apparent raised edge at one seam is visible; its extent needs an in-person check.
POINT 03
Worn or damaged patch
Move across visible scuffs, wear or damage, with a nearby fixed feature for location.
A discoloured, worn-looking patch is recorded beside the corridor route.
POINT 04
Threshold and level change
Show the transition between finishes and the adjacent route. Record an apparent height difference without estimating a measurement from video.
The doorway threshold and adjoining floor finish are visible.
What can a floor finish visual inspection record?
Identify the property, room, floor type and visit date. Begin with a wide view, then move to accessible joins, wear and level transitions. Give each concern a precise location. This is a visual record of accessible floor finish only. Video does not measure slip resistance, prove substrate condition, identify a cause or establish that a route is safe to use.
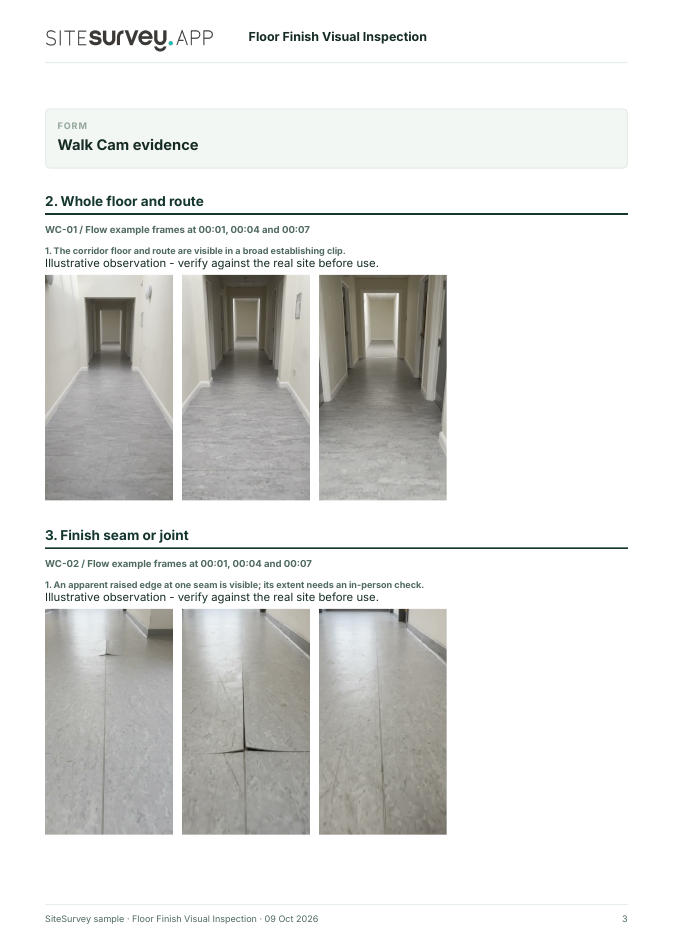
The six-page sample contains four inspection points, twelve footage stills, scripted observations and follow-up actions. The preview shows the first visual-evidence page.
Identify the property, room, floor type and visit date. Begin with a wide view, then move to accessible joins, wear and level transitions. Give each concern a precise location.
01
Whole floor and route
Show the room and route in a wide view before close details. Record the floor finish and exact location.
Example observation
“The corridor floor and route are visible in a broad establishing clip.”
Scripted example, not a real finding.02
Finish seam or joint
Film the accessible seam from two angles, keeping adjoining sound finish in the frame. Do not pull up the material.
Example observation
“An apparent raised edge at one seam is visible; its extent needs an in-person check.”
Scripted example, not a real finding.03
Worn or damaged patch
Move across visible scuffs, wear or damage, with a nearby fixed feature for location.
Example observation
“A discoloured, worn-looking patch is recorded beside the corridor route.”
Scripted example, not a real finding.04
Threshold and level change
Show the transition between finishes and the adjacent route. Record an apparent height difference without estimating a measurement from video.
Example observation
“The doorway threshold and adjoining floor finish are visible.”
Scripted example, not a real finding.
How to use the record
Make the visual evidence useful.
Identify the visit
Record the asset or site, visit stage, date and inspector. Keep each clip attached to its point and note anything inaccessible.
Describe, then escalate
Say what the camera shows and where it is. Record the next action without guessing the cause or declaring a specialist result from video.
Use the relevant guidance
HSE explains that floor suitability, condition and contamination affect slip and trip risk. HSE · Flooring ↗
Inspection scope
This is a visual record of accessible floor finish only. Video does not measure slip resistance, prove substrate condition, identify a cause or establish that a route is safe to use.
Questions, answered
Floor finish visual inspection FAQs
Can a video prove a floor is slip resistant?
No. Slip resistance needs an appropriate assessment or test; footage records visible finish and location only.
What should be recorded before a close-up?
Identify the room and route in a wide view so a repairer can find the exact seam, patch or threshold.
What if a raised seam may be a trip hazard?
Follow the site's immediate hazard-control process and arrange an in-person assessment; do not wait for the report to manage the route.
What is in the example report?
A fictional corridor visit with four clip stills, narrated observations, next actions and explicit limits.
Sources and review
Guidance checked 9 October 2026. The four-point route is a SiteSurvey example, not a method prescribed by these sources.
Explains workplace requirements concerning floors and traffic routes.
Search research: Keywords Everywhere estimated 480 UK monthly searches for “floor inspection” when checked 9 October 2026. Broad UK query spanning construction checks, testing and property surveys; software buyer demand is unverified. This is not a traffic or conversion forecast.
SiteSurvey Walk Cam explains the product capability. The clips are AI-generated examples.