- 01
Four words to know first
A customer is who the work is for, such as a council or housing association. A project is one inspection of one home. A space is where the inspection takes place; for a home you only need one, called House. A form is the checklist you fill in on the visit, and the rooms are recorded inside the form. That is all there is to it.
- 02
Start a new project
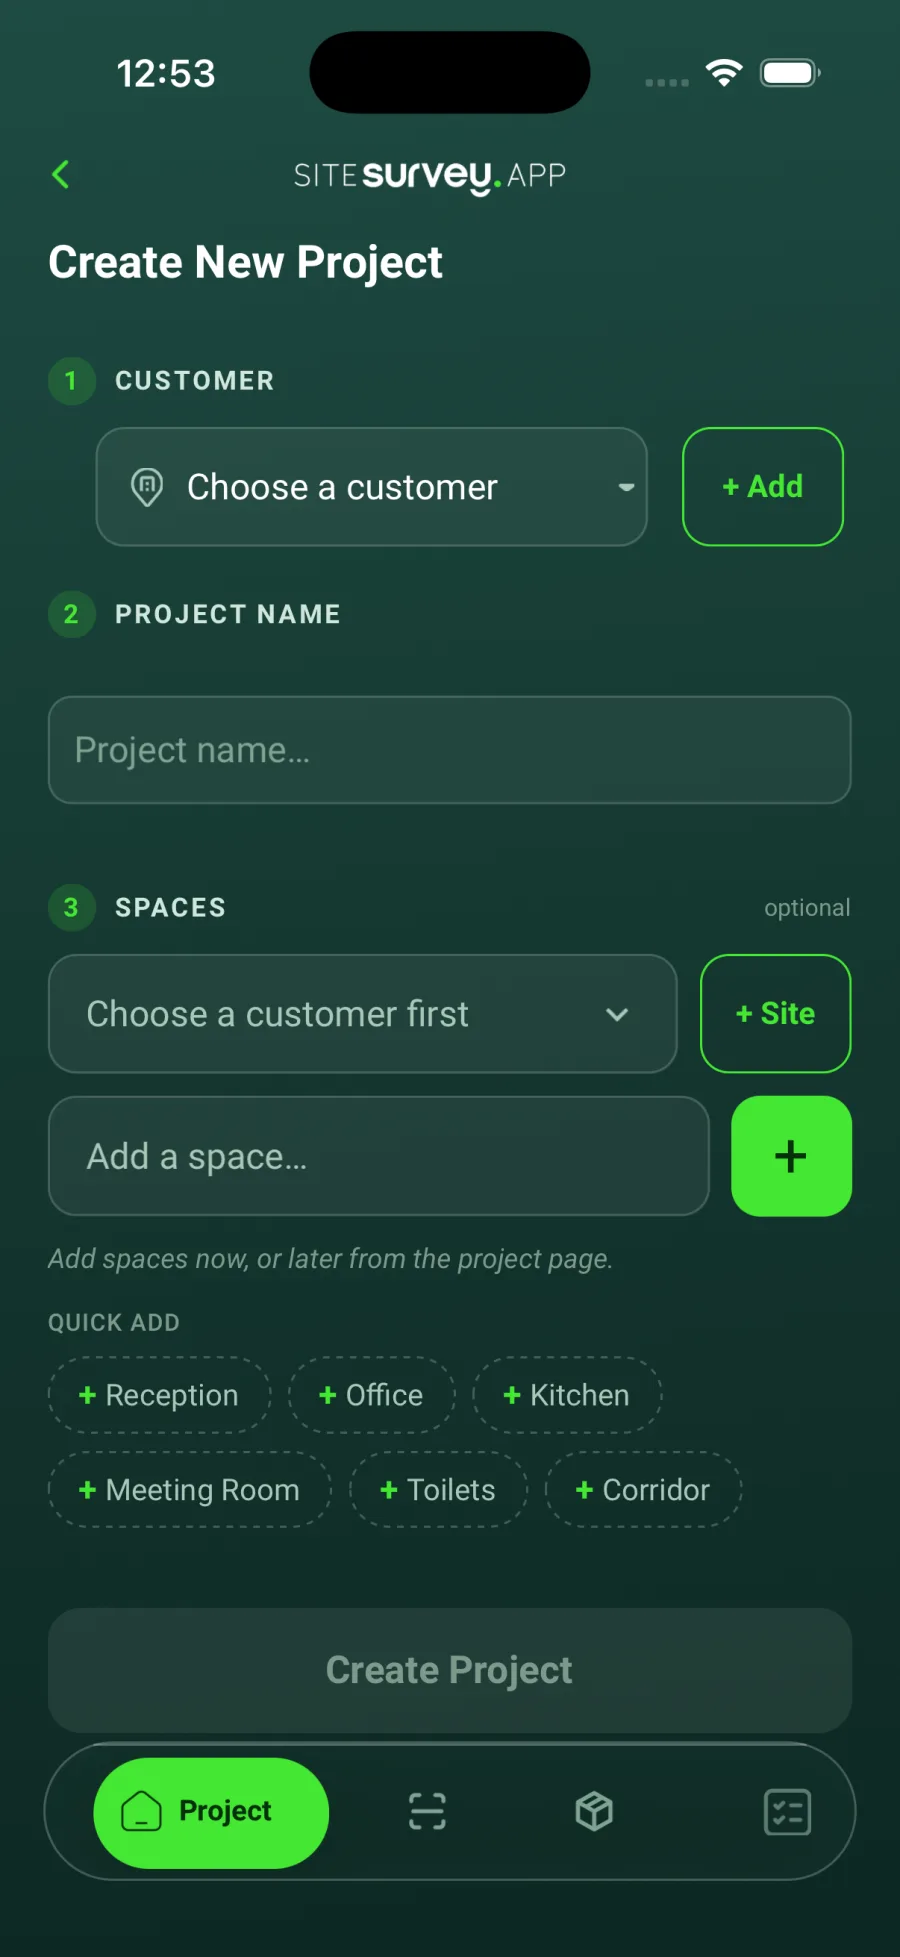
Open the app. On the Project tab, tap the round green + button at the bottom right of the screen. The Create New Project screen opens. It has three numbered parts: 1 Customer, 2 Project name and 3 Spaces. Work down them in that order.
- 03
Add the customer (first time only)
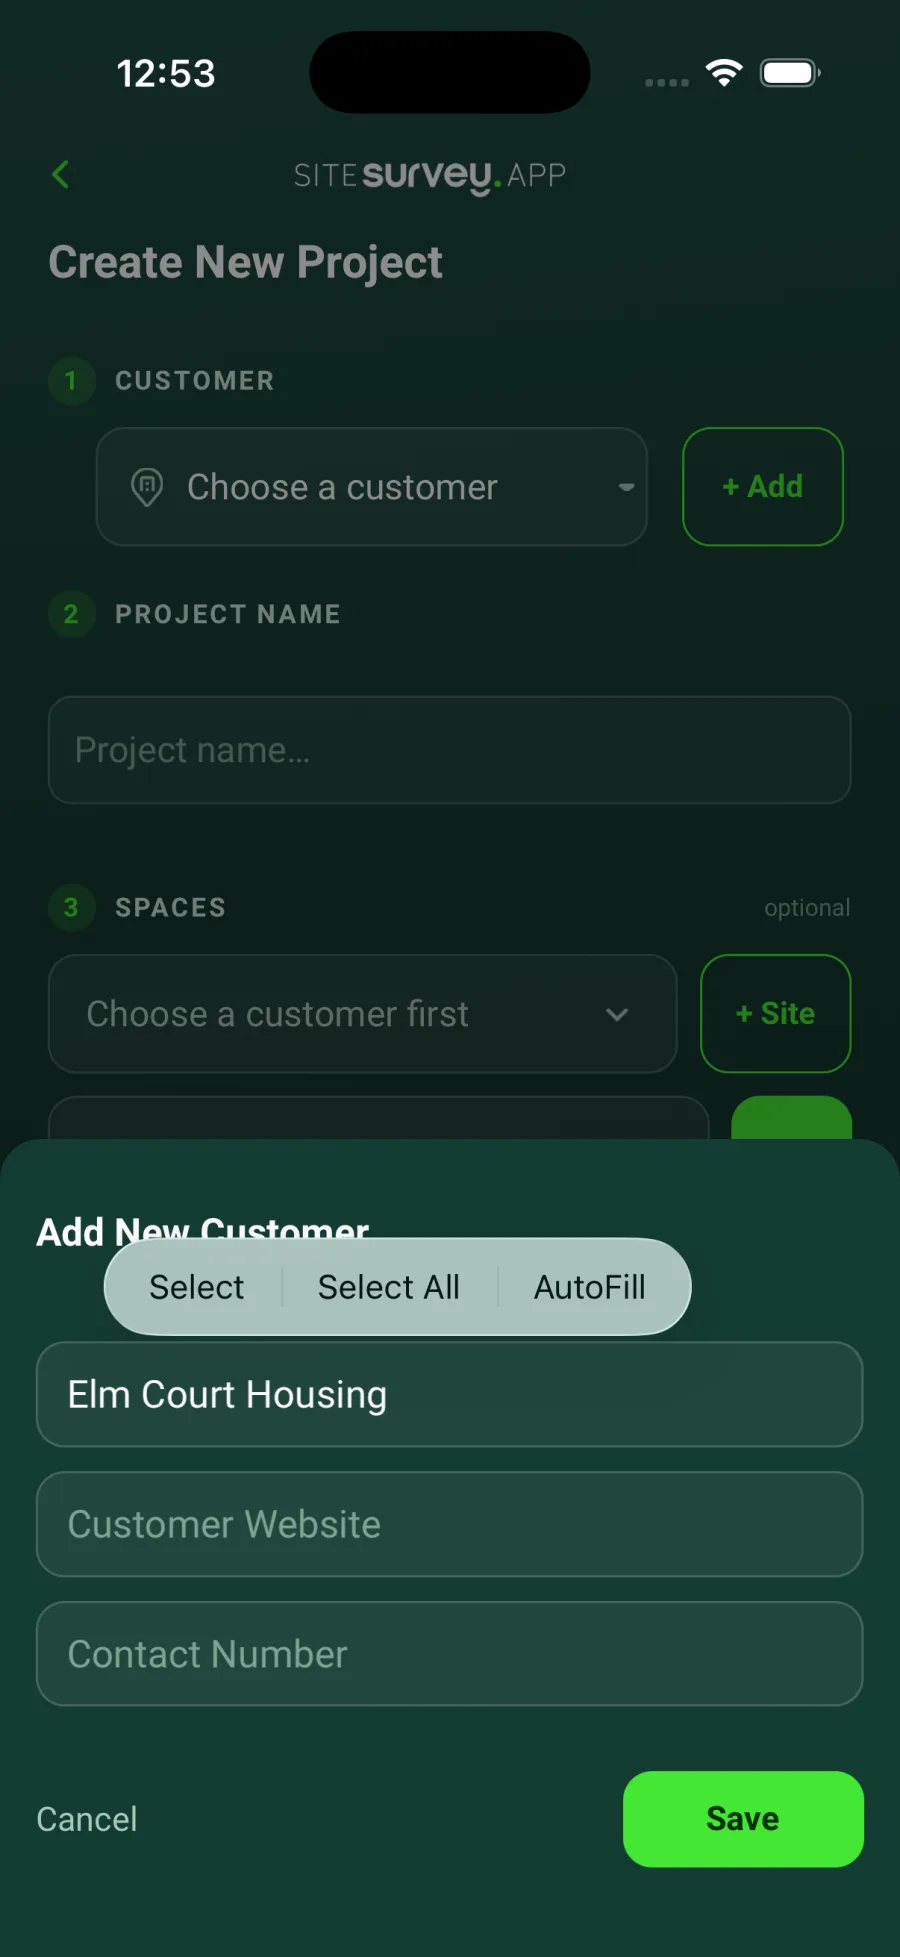
Beside Choose a customer, tap + Add. Type the customer's name, for example the council or housing association you are working for. Website and contact number can be left empty. Tap Save and you will see Customer added successfully. Now tap Choose a customer and tap the name you just added. You only add a customer once. Next time, skip + Add and pick the customer from the list.
- 04
Give the project a name
Tap the Project name box and type a name you will recognise later. The address works well, for example Flat 12, Elm Court - damp and mould. Remember: one project is one inspection of one home.
- 05
Add the site (the address)
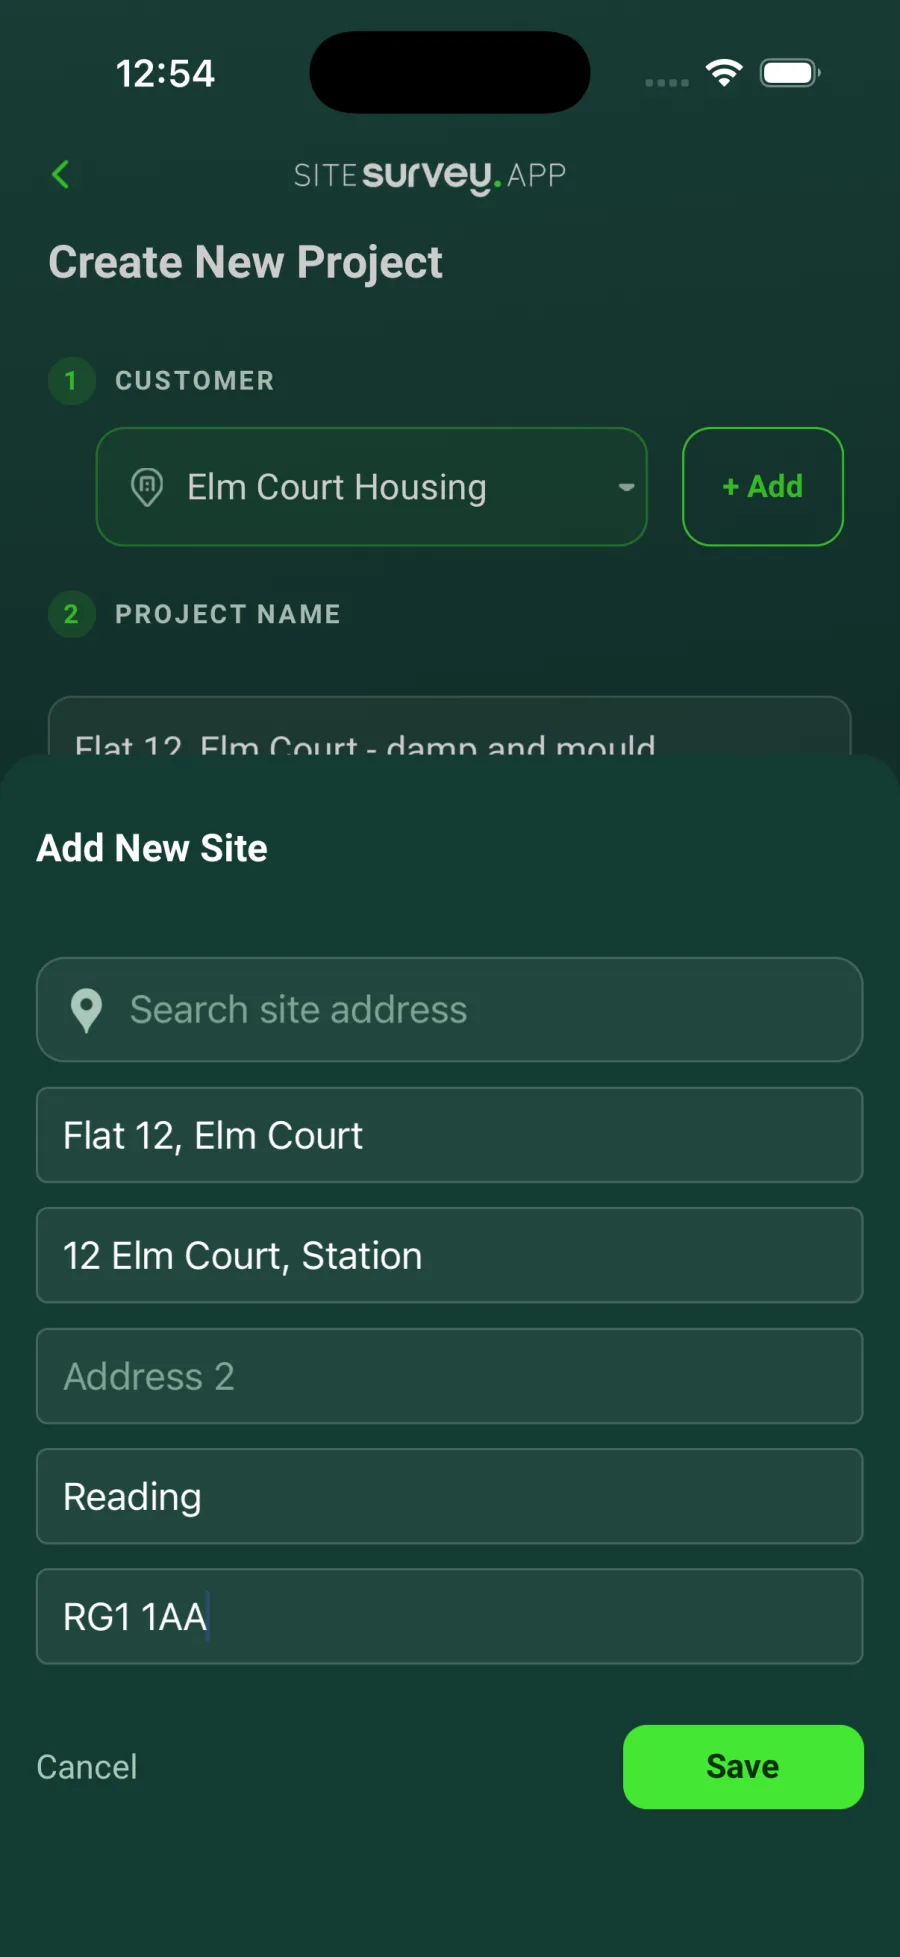
Under 3 Spaces, tap + Site. You can search for the address, or type it in yourself: a site name, the first line of the address, the town and the postcode. Tap Save. The site is now chosen for this project. This is the address the project is filed under.
- 06
Add one space called House
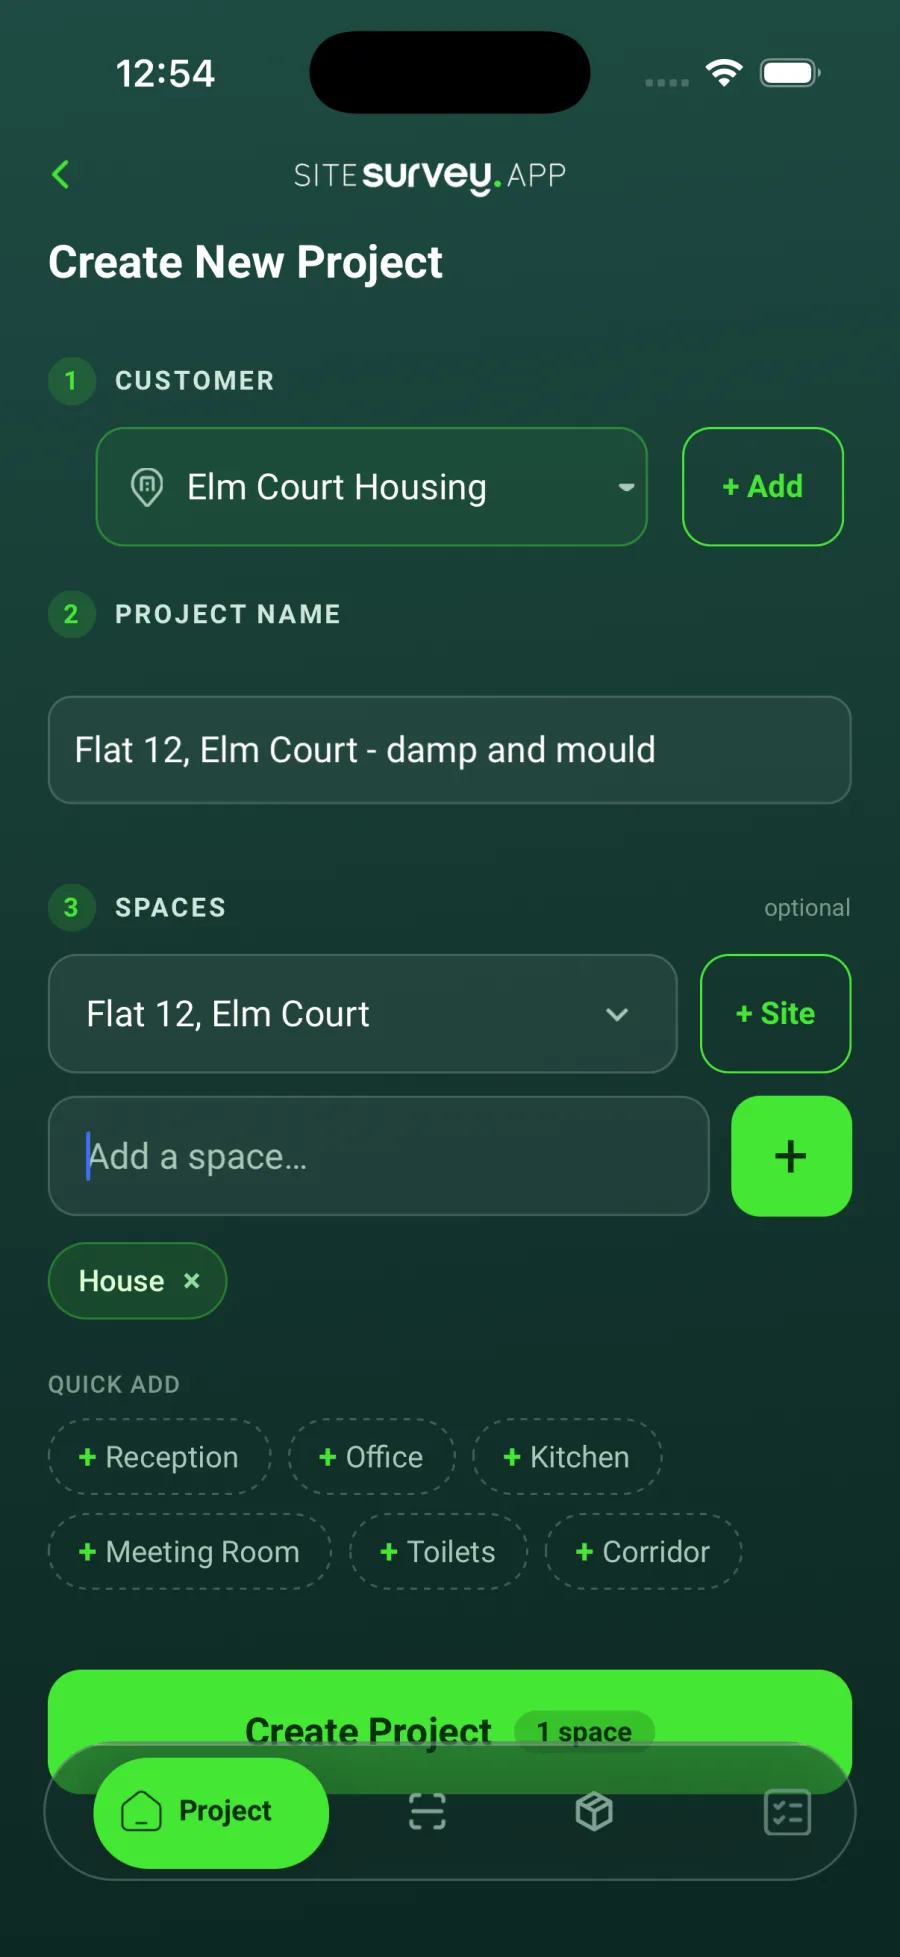
Tap Add a space, type House (or Flat) and tap the green + beside it. House appears underneath as a small tag. You only need this one space. Do not add a space for every room. The form has its own Room record page where you add each affected room, and the report shows them all. When the screen looks like the picture, tap Create Project.
- 07
Understand the stages
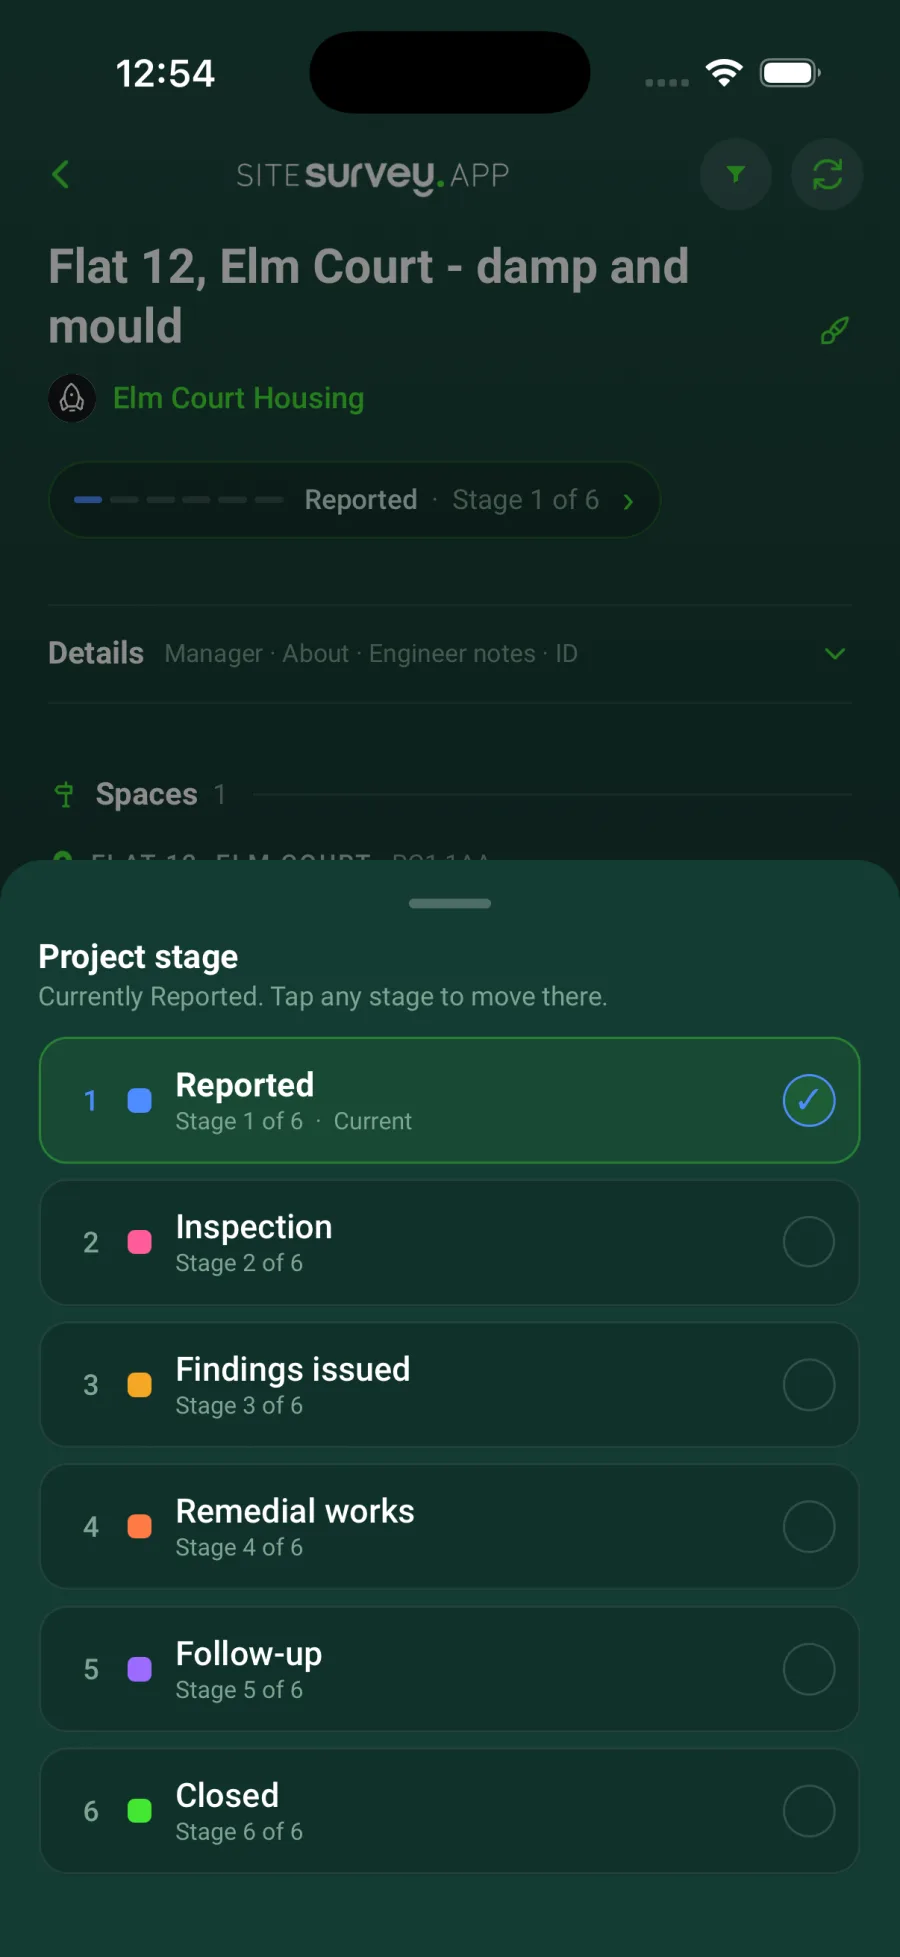
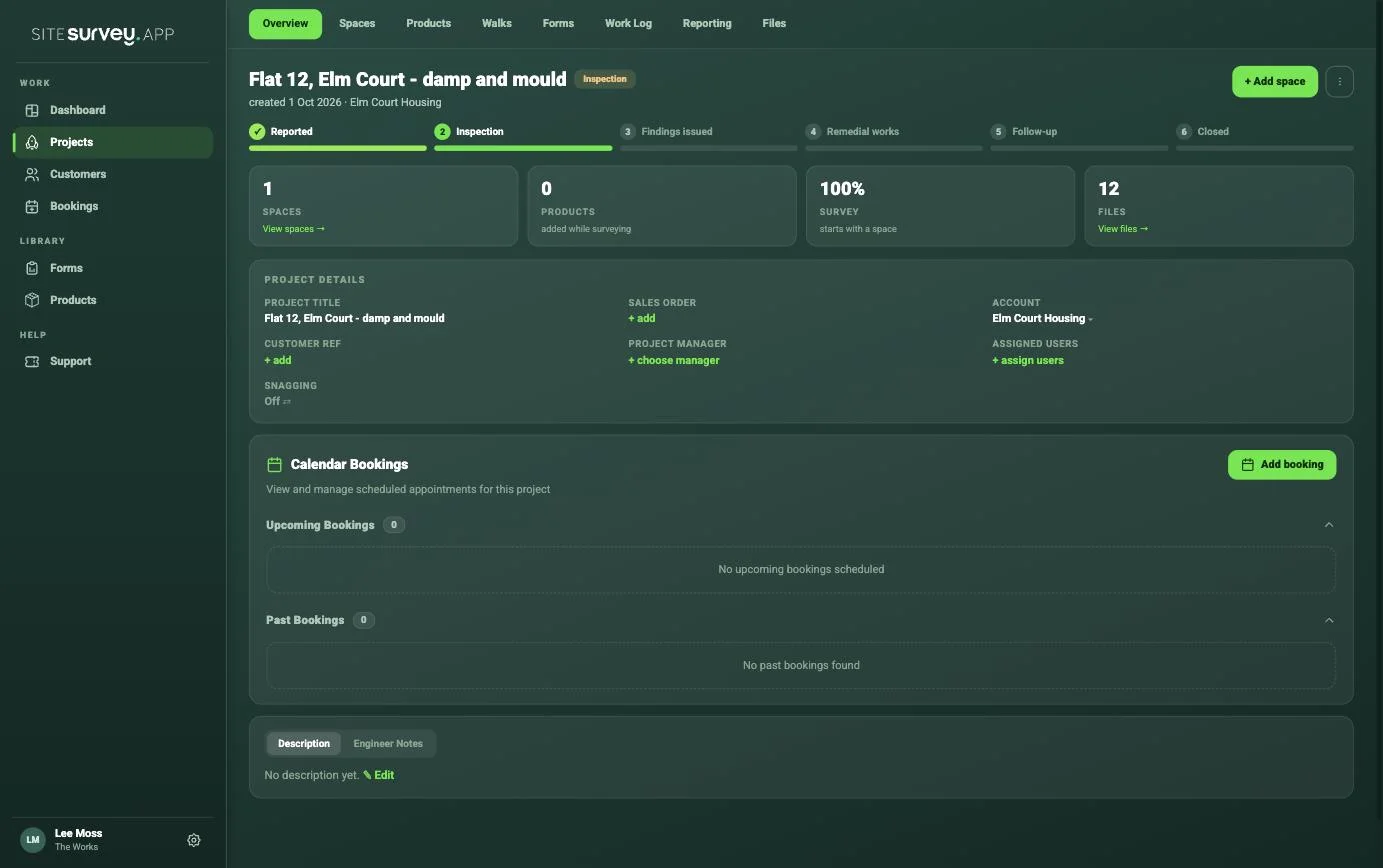
The project opens, and near the top is a line showing its stage. A stage simply shows where the case has got to. Reported: the landlord has been told about the problem. Inspection: the visit is booked or under way. Findings issued: you have decided whether there is a hazard and given the resident the written summary. Remedial works: the repairs are being done. Follow-up: you are going back to check the mould has not returned. Closed: there is nothing more to do.
- 08
Move the project to the next stage
Tap the stage line near the top of the project. The list of stages slides up, with a tick beside the current one. Tap the stage the case has now reached and you will see Stage updated. You can move forwards or backwards at any time, so there is no harm in trying it.
- 09
Add the inspection form
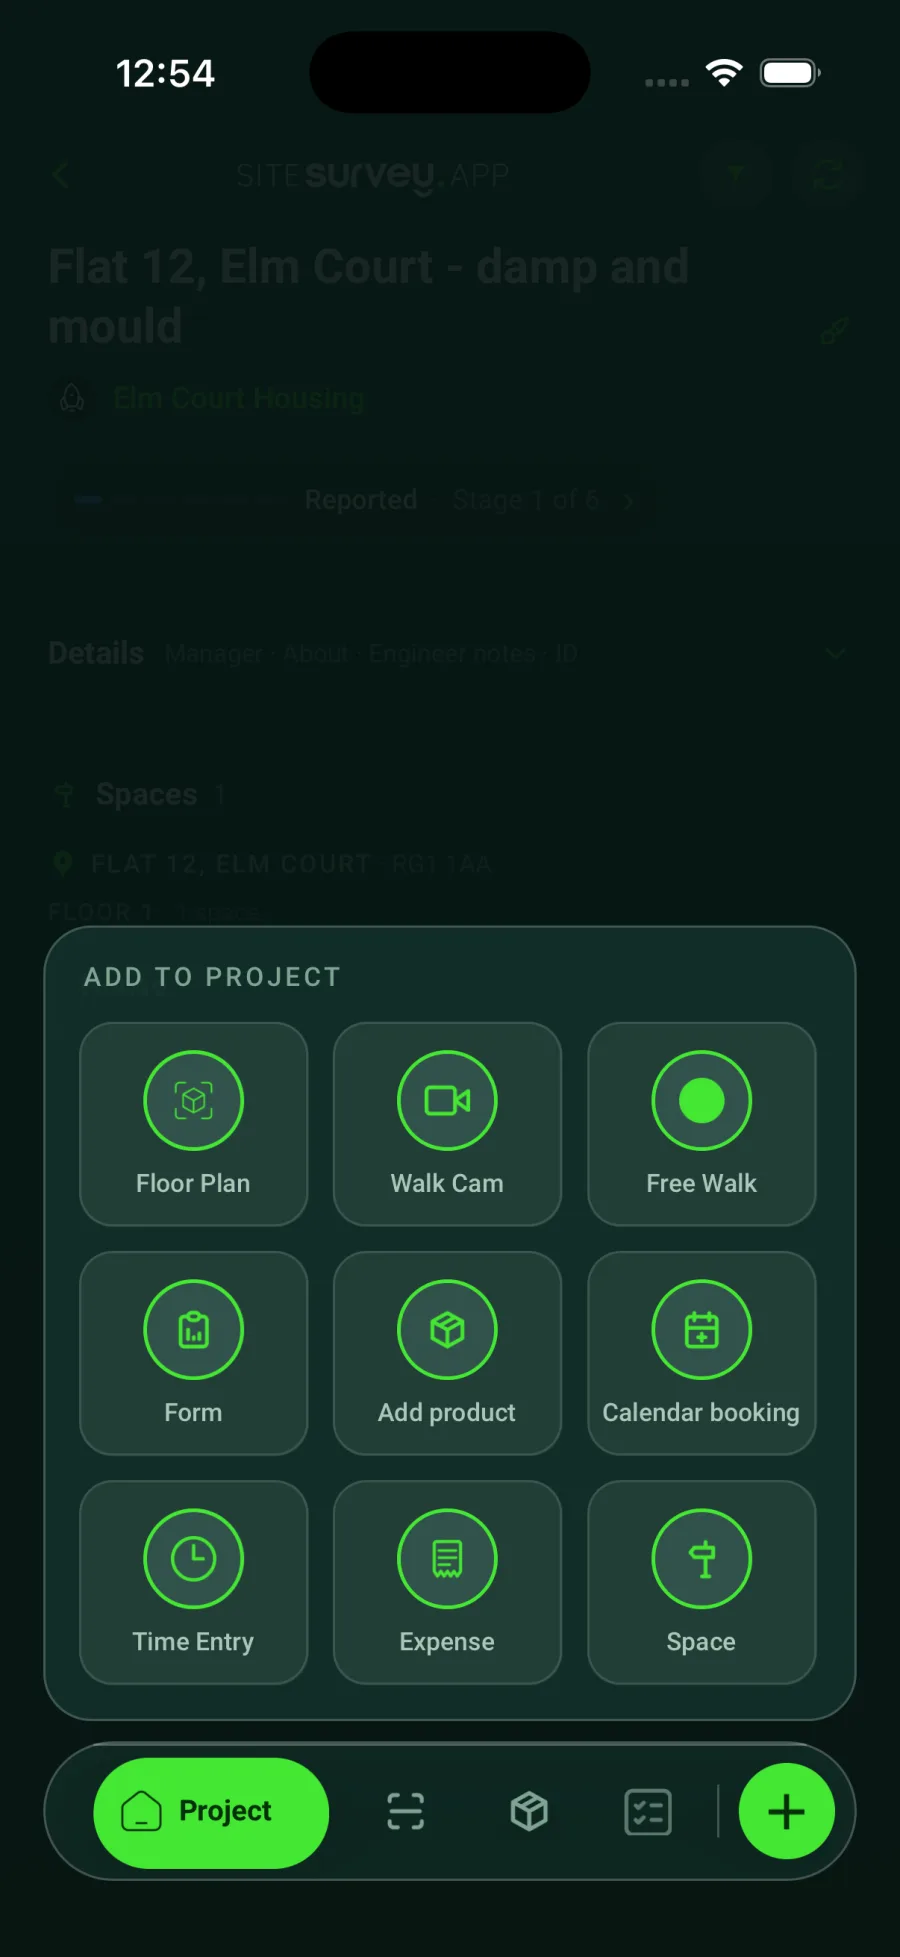
On the project page, tap the green + at the bottom right again. This time a menu called Add to project opens. Tap Form.
- 10
Choose the damp and mould form
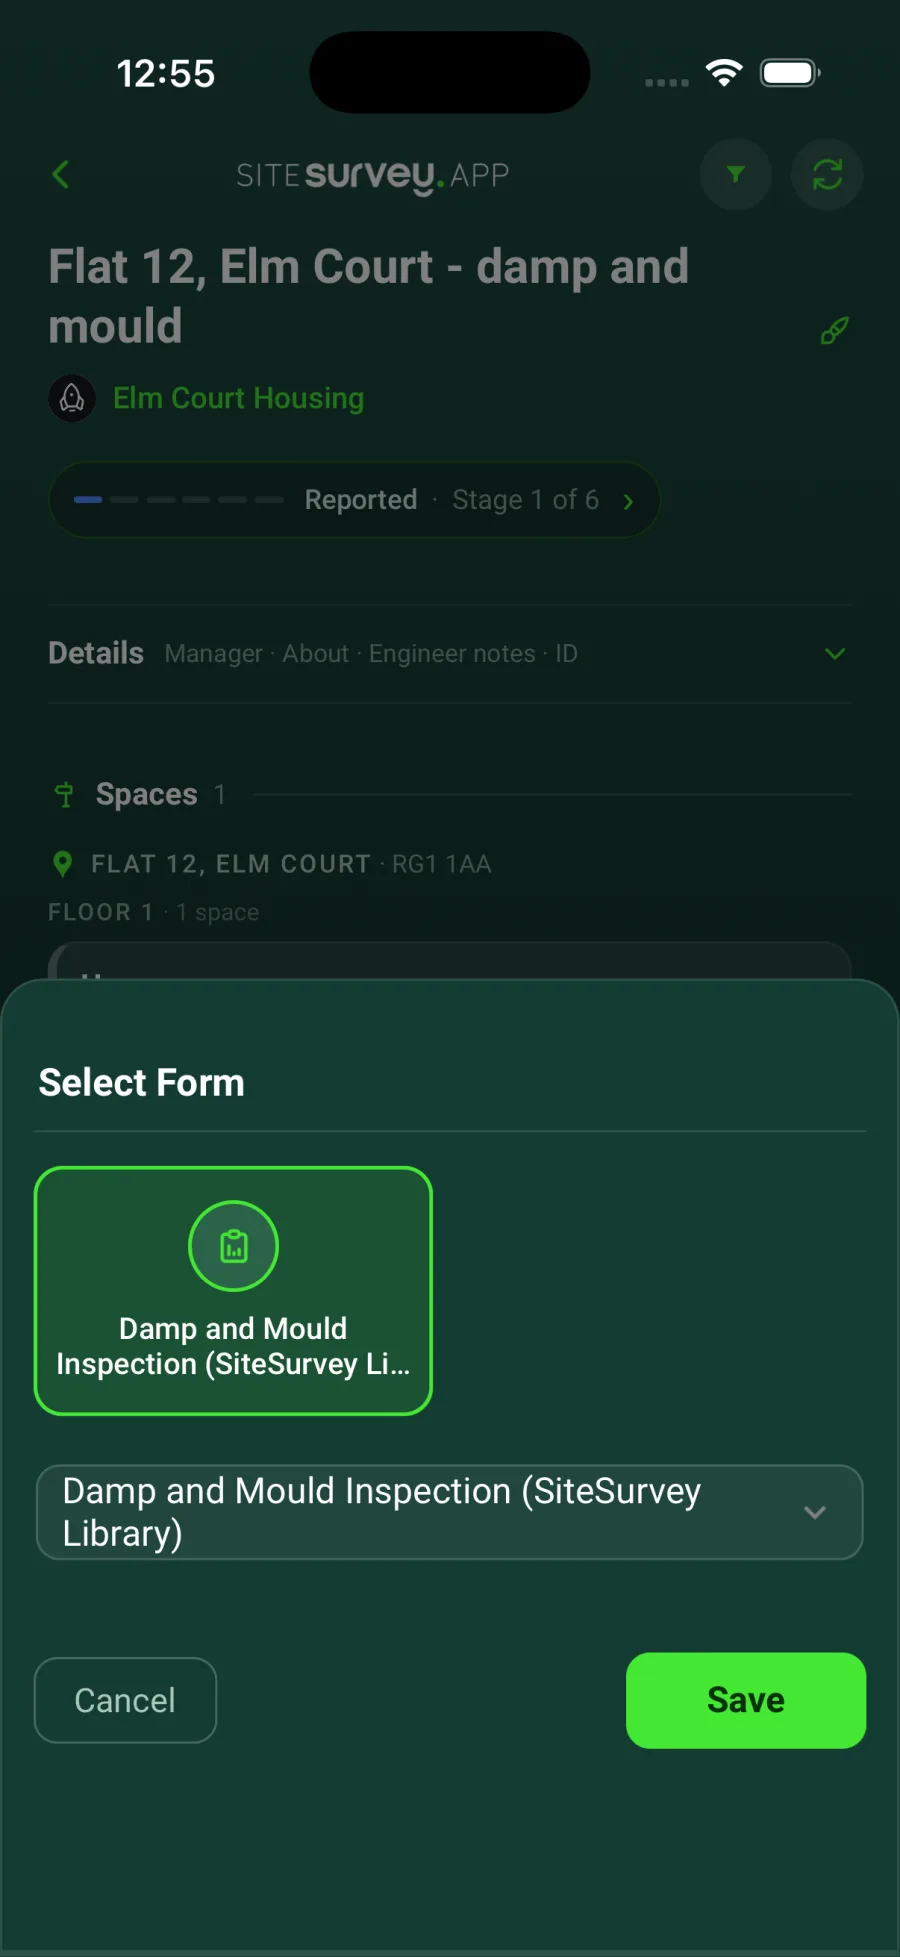
Tap Damp and Mould Inspection so it is highlighted, then tap Save. The form opens straight away at page 1.
- 11
Fill in the form, one page at a time
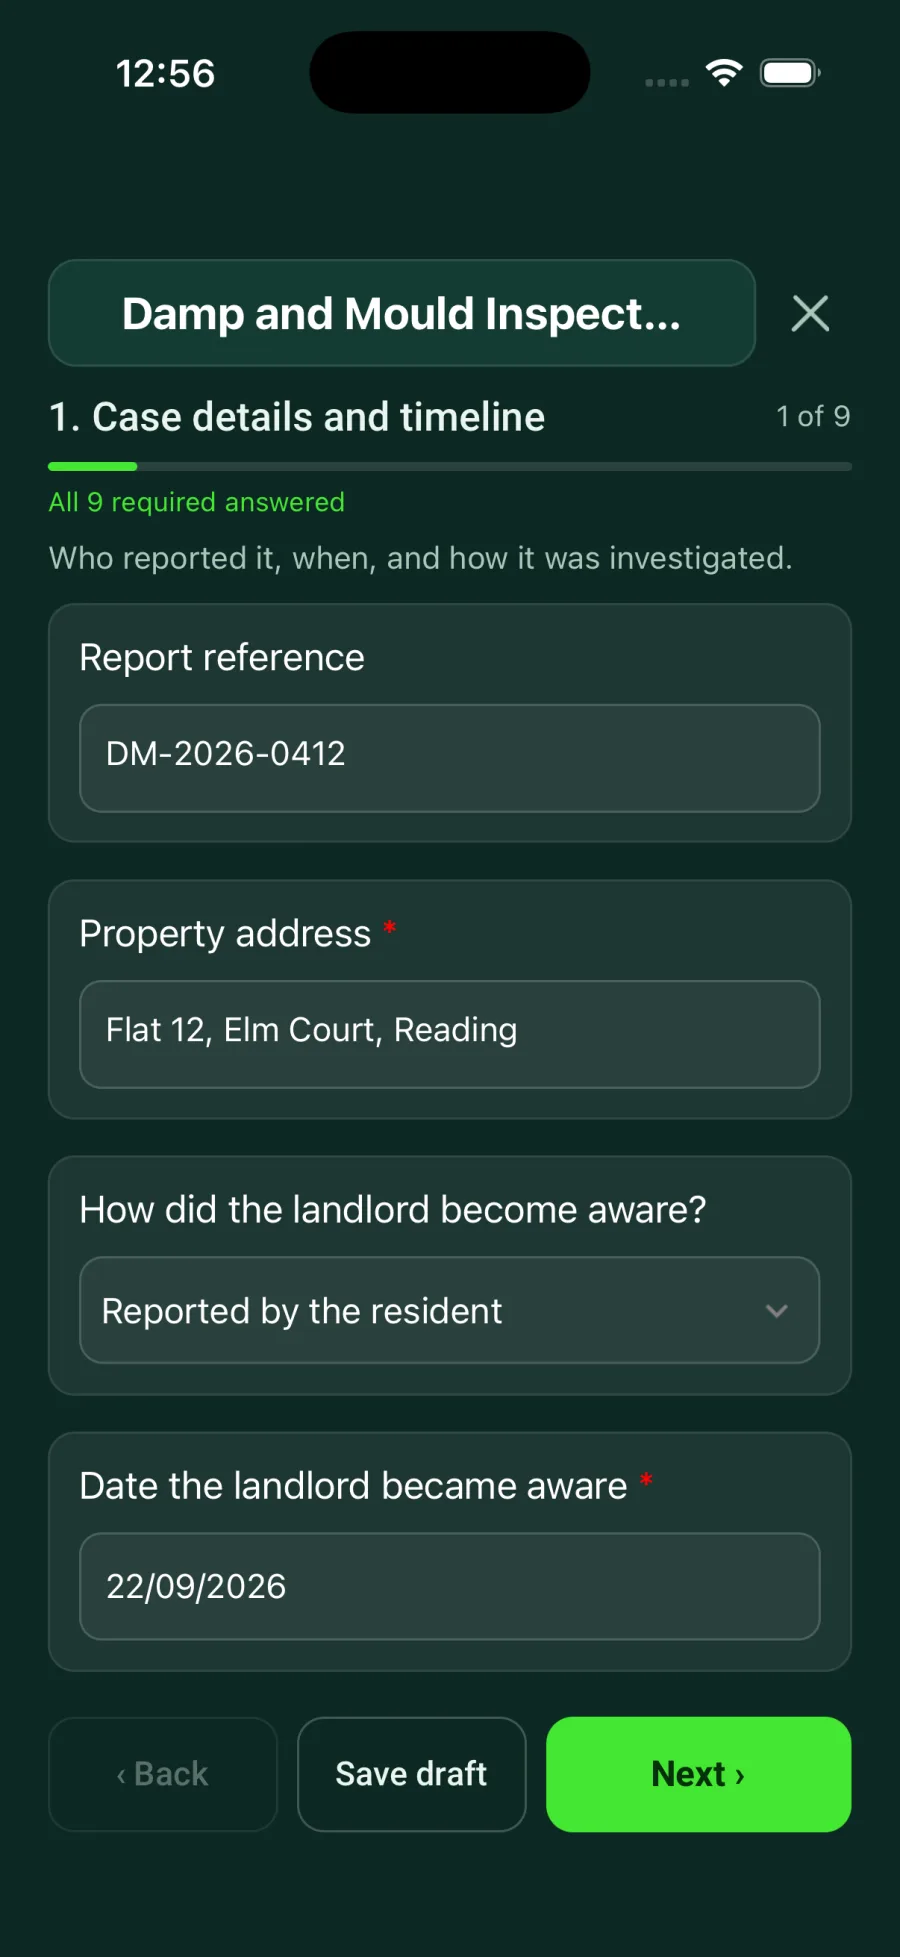
Answer the questions on the page, then tap Next. A red star marks a question that must be answered. The line at the top tells you which page you are on and how many of the required questions are done. Tap Save draft whenever you need to stop. Your answers are kept, and you can carry on later, even with no signal.
- 12
Record each affected room
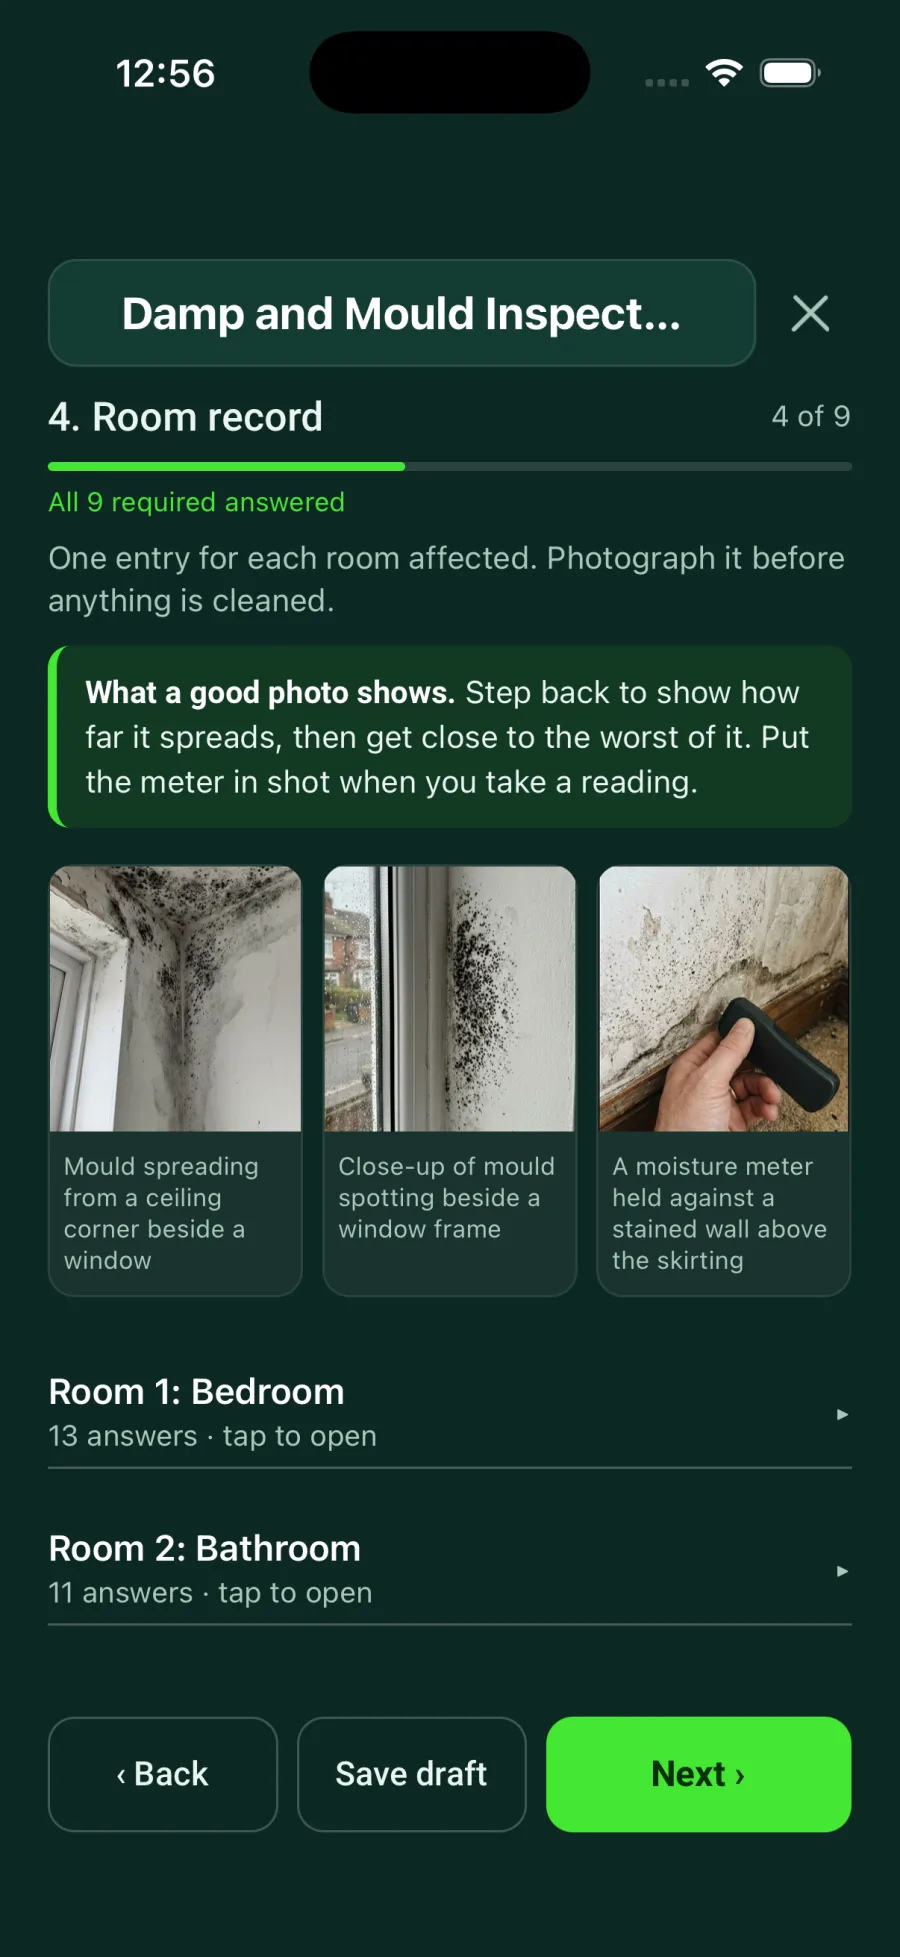
Page 4, Room record, is where the rooms go. Fill in the first room: which room it is, where the damp or mould is, your photos, the sizes and your readings. For the next room, tap Add another. Each finished room folds down to one line, such as Room 1: Bedroom, and you tap it to open it again. This is why the project only needed one space.
- 13
Finish the form
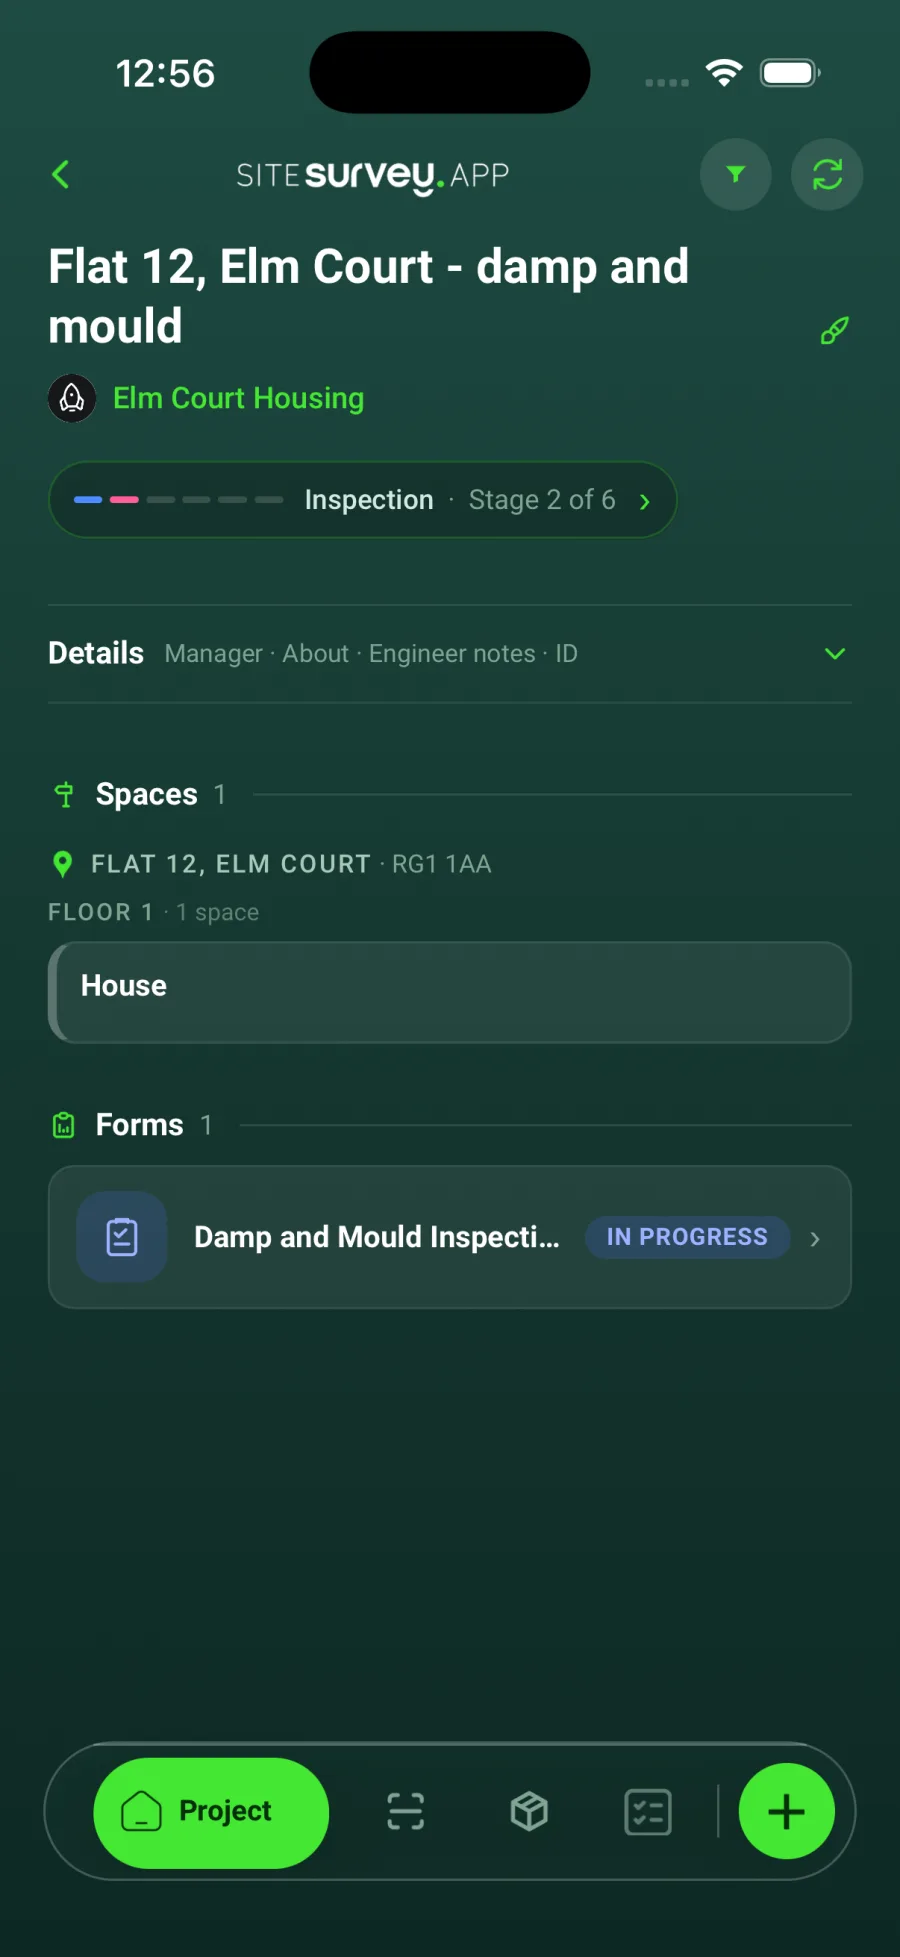
Keep tapping Next until you reach the last page. Sign in the signature box, then tap Complete. The project page now lists the form. It uploads straight away, or as soon as the phone has signal again.
- 14
Send the report from the app
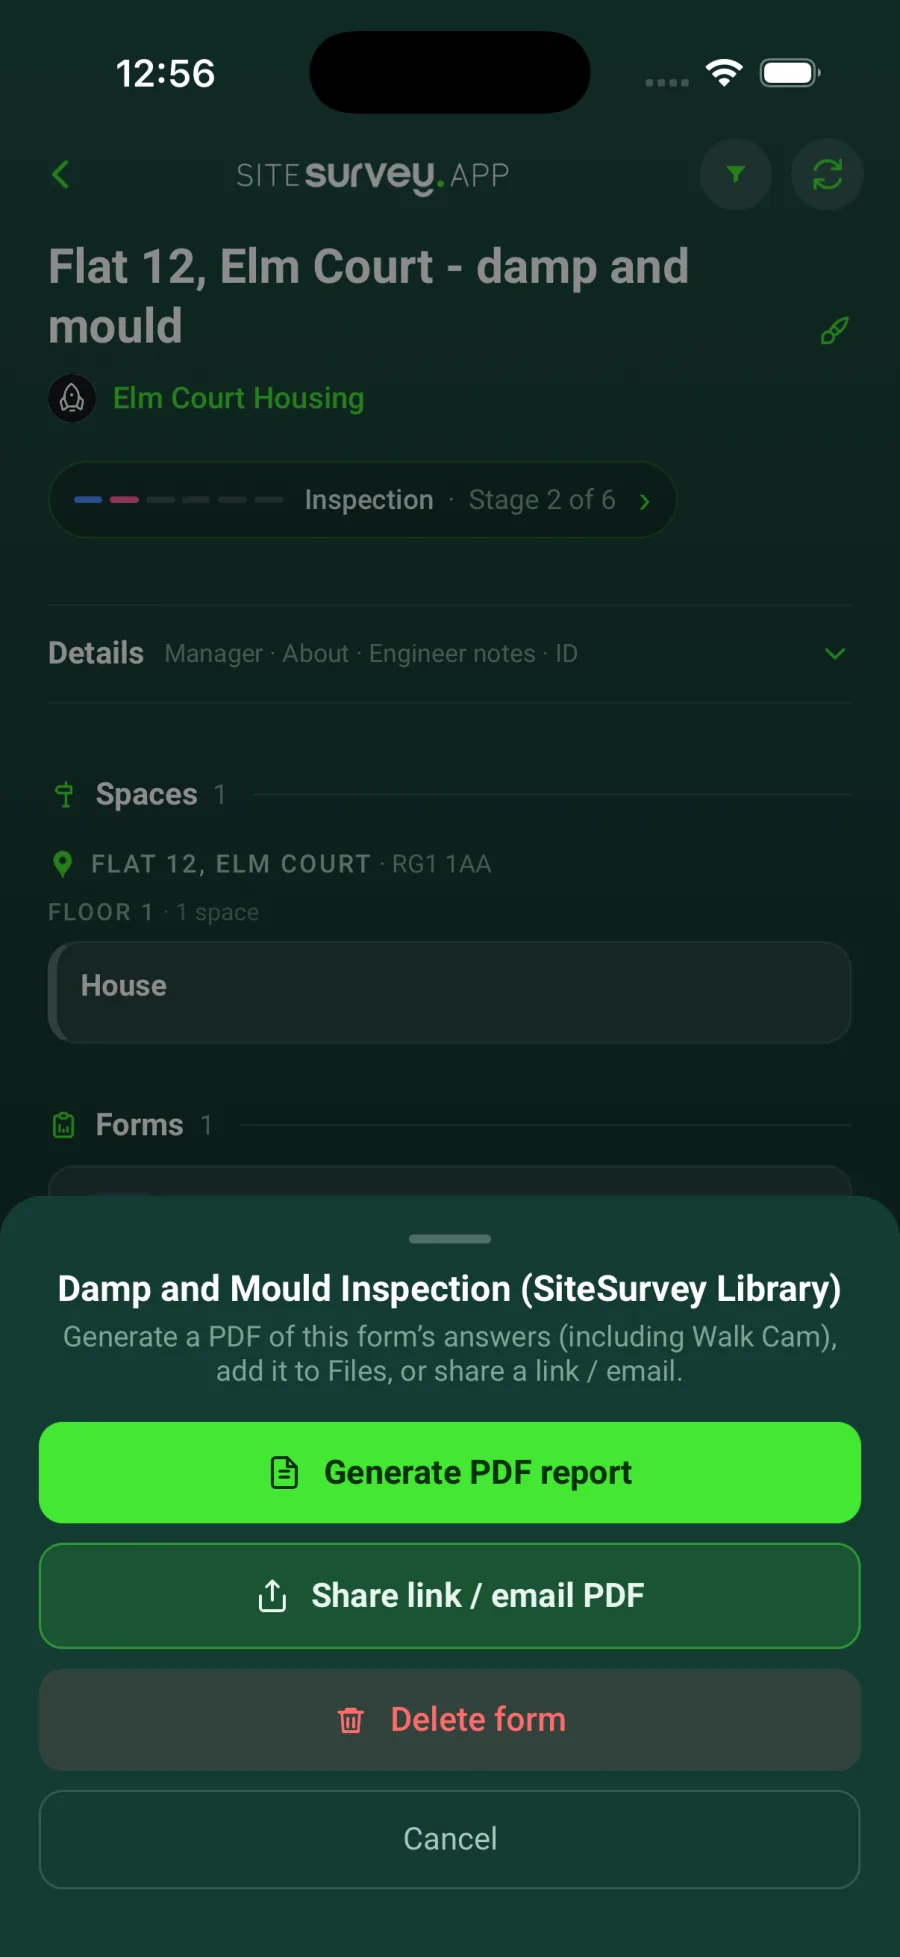
On the project page, press and hold the form's name for about a second. Do not just tap it, because a tap opens the form. A panel slides up. Tap Share link / email PDF. The app builds a PDF of the answers and photos and saves it with the project. You need signal for this step.
- 15
Email it, or send a link
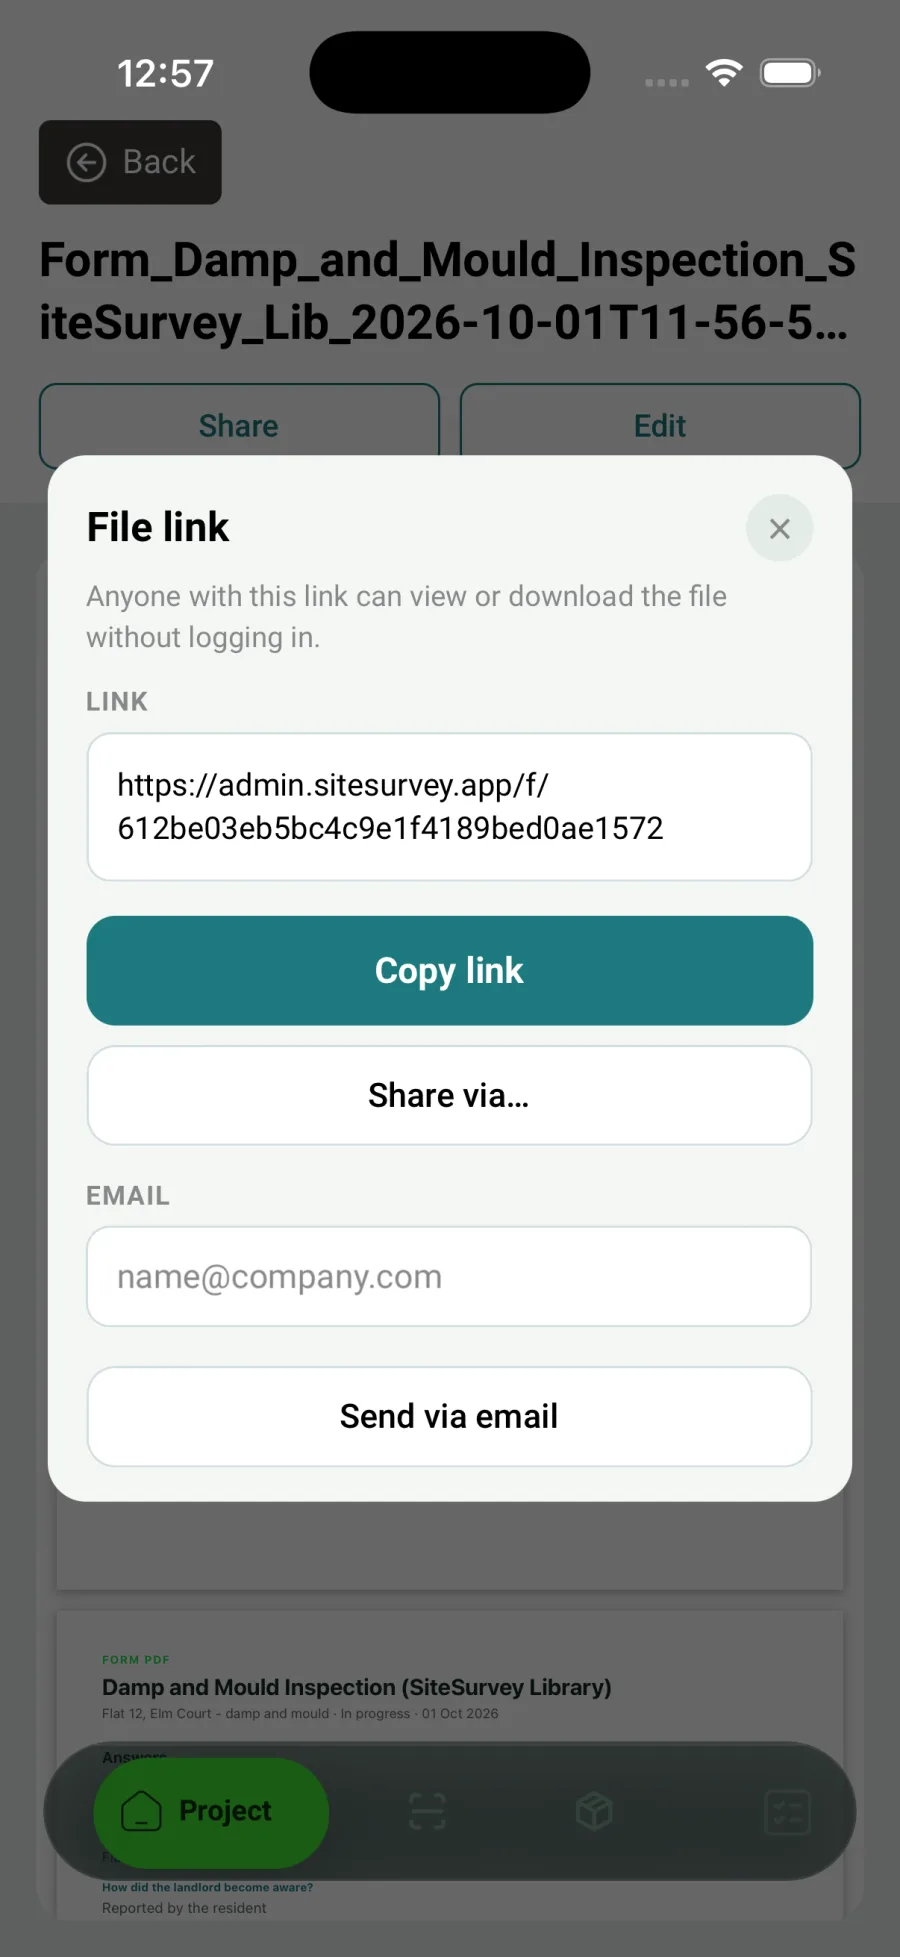
A box called File link appears. To email the report, tap the box under Email, type the person's email address and tap Send via email. They receive an email with the PDF. To send it another way, tap Copy link and paste the link into a text or a message, or tap Share via. Anyone who has the link can open the report without logging in.
- 16
Check what was sent
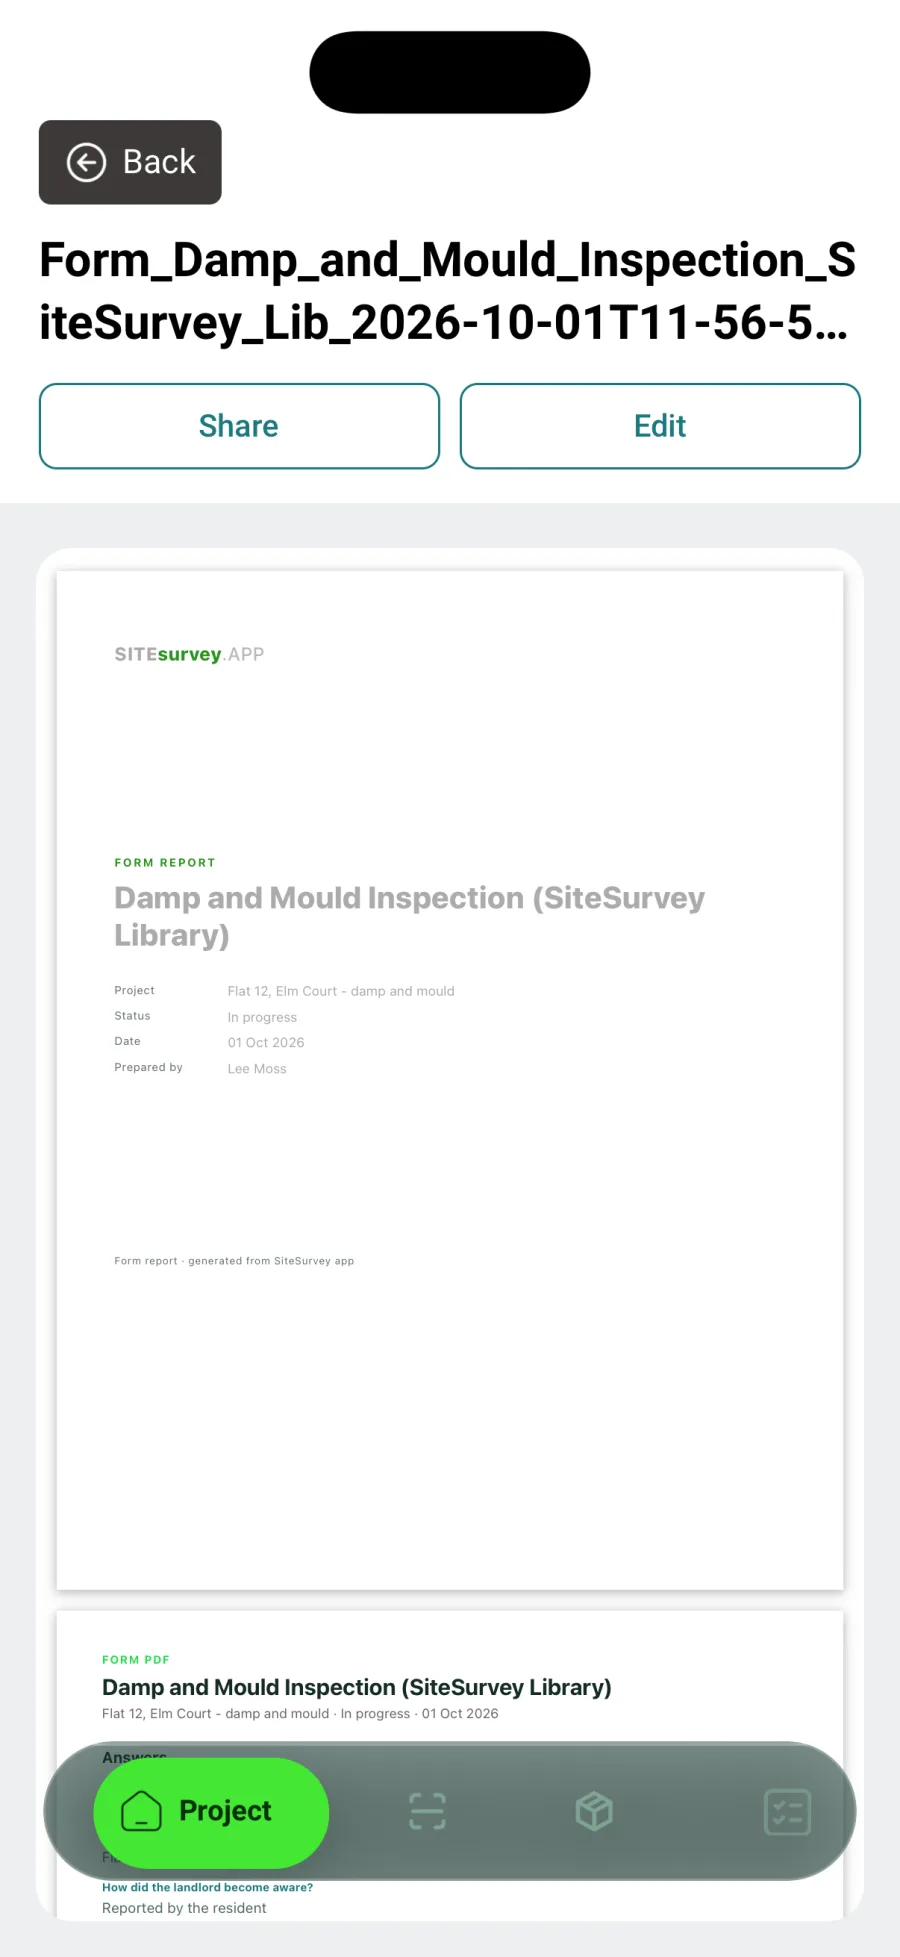
Close the box to see the PDF itself. It stays saved with the project, so you can open it again later and tap Share to send it to someone else.
- 17
For a more professional report, use the web dashboard
The app report is quick and plain. For a report that looks its best, use a computer. Go to admin.sitesurvey.app and sign in with the same email and password you use in the app. Click Projects, then click your project. Everything you captured on the phone is already there, including the stage.
- 18
Build the report on the web
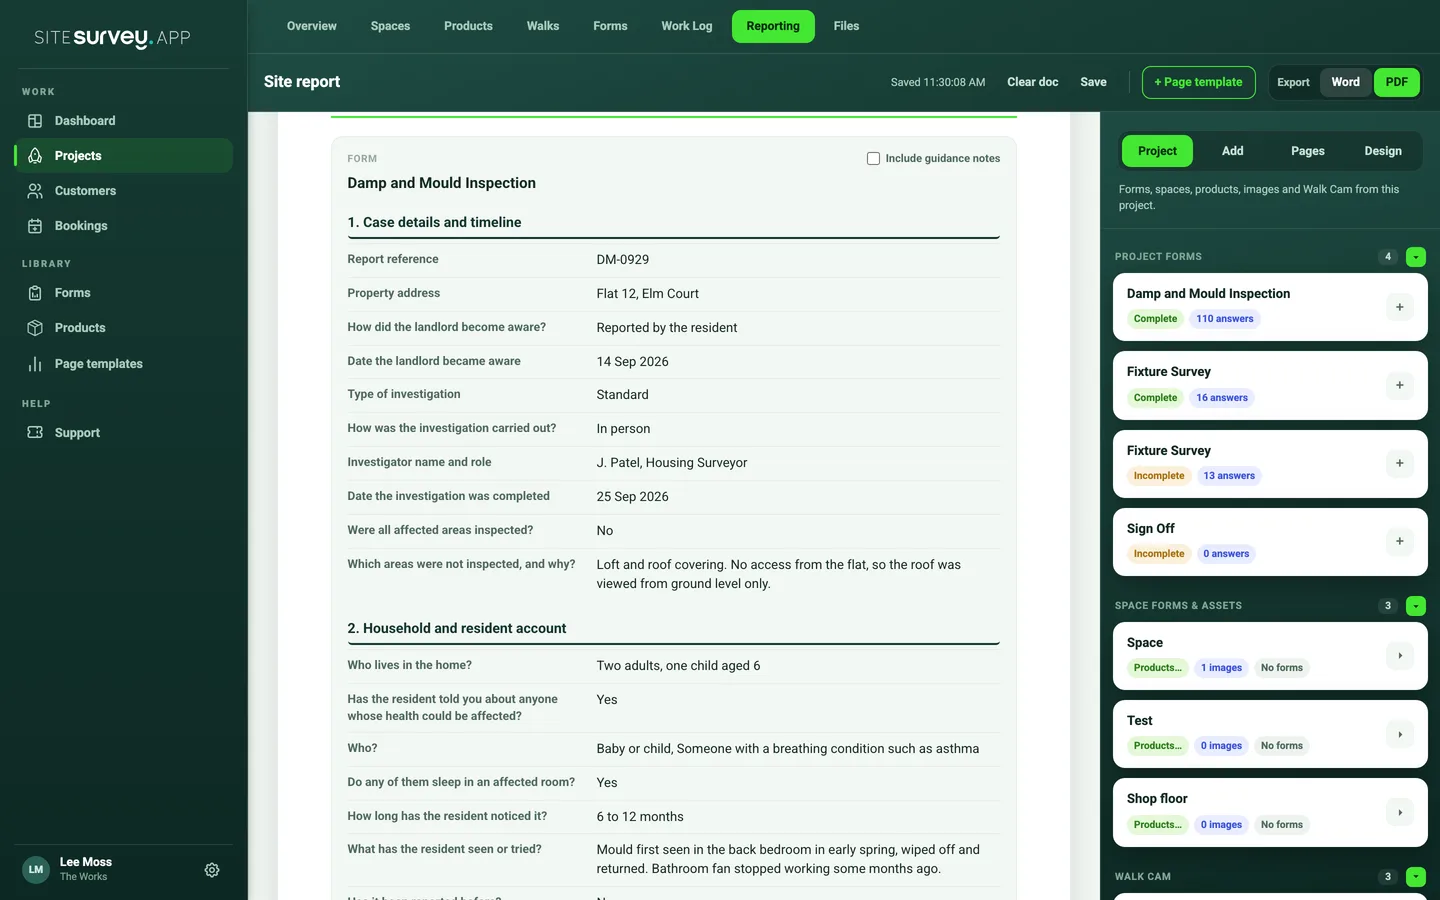
Click the Reporting tab at the top. On the right is a panel with the Project tab open. Under Project forms, click the + beside Damp and Mould Inspection. The whole form drops into the report, set out under its section headings.
- 19
See what the web report adds
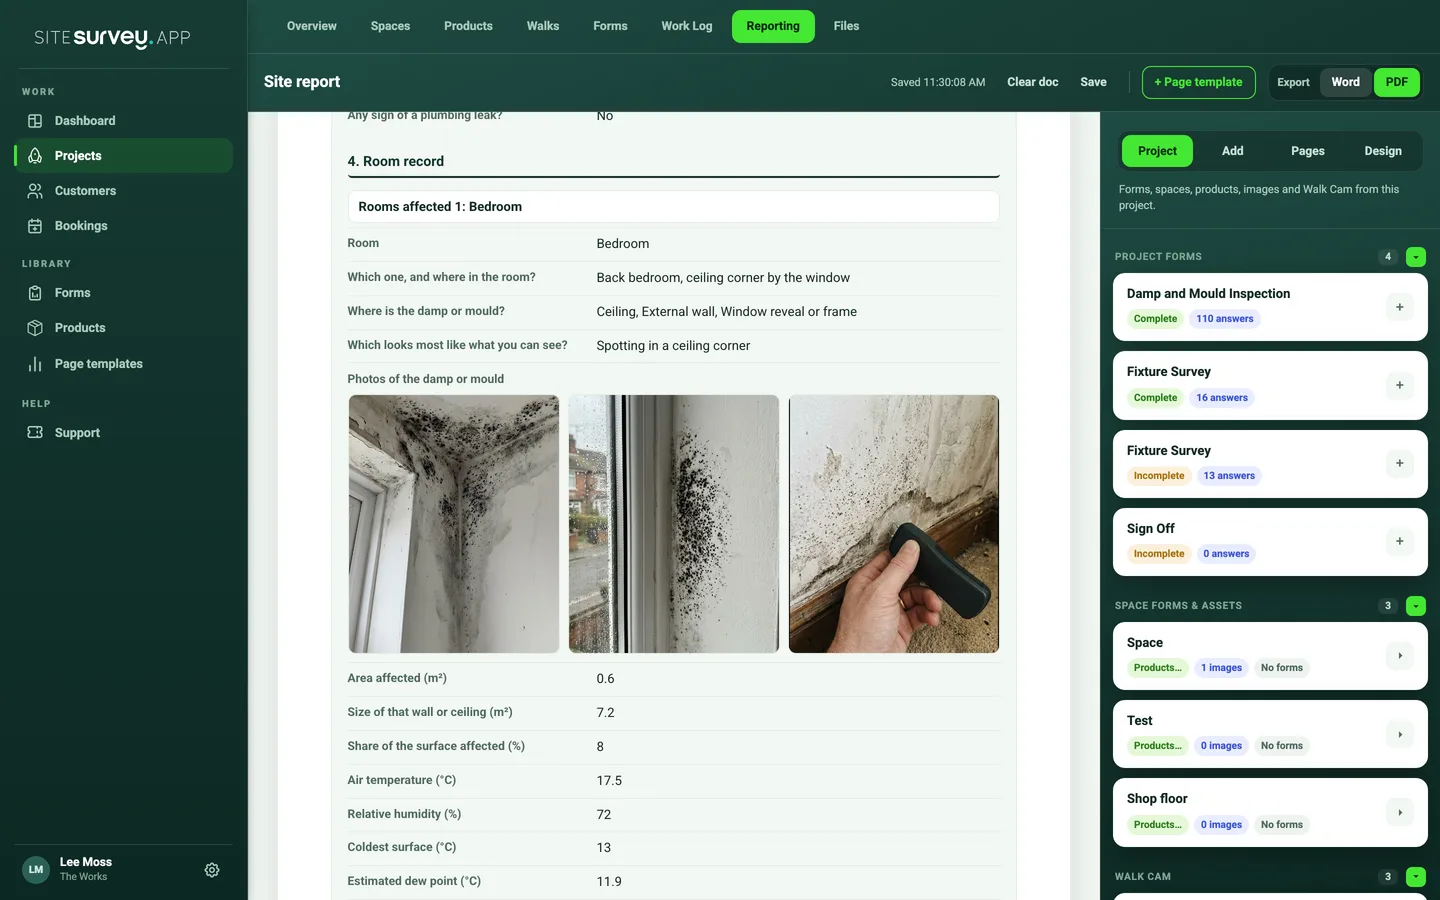
Each room has its own section with its photos side by side and its readings in a table. You can click any text to correct it, type your own paragraphs, and add a front cover with your logo. Tick Include guidance notes if you want the form's guidance printed in the report.
- 20
Export and send the web report
Use Export at the top right and click PDF, or Word if you want to edit it further. The file downloads to your computer and a copy is saved in the project's Files tab. Attach the downloaded file to an email in the usual way.
Good to know
- ✓App or web? Use the app when you need to send something quickly from the property. Use the web dashboard when the report needs to look its best, for example for a resident's file or a manager.
- ✓After the first time, a new inspection is just: tap +, choose the customer, name the project, add the site, add House, tap Create Project.
- ✓Your stages may have different names. An administrator can change them on the web dashboard.
- ✓If a report will not send, check the phone has signal, then press and hold the form and try again.
Was this guide helpful?
Your feedback helps us improve support content.