- 01
Add the form to the project
Open the project and add the form from its Forms tab, on the phone or on the web. Add it to the project, not to a space: the spaces are created for you. Forms that work this way include School AV Survey, Schedule of Condition, Inventory and Check-in, Routine Property Inspection, Damp and Mould Inspection, AV Maintenance Visit, Roof Inspection, Site Inspection, Wi-Fi Site Survey, both cleaning forms and IT and Network Site Survey.
- 02
Answer the shared pages once
Pages about the whole site, such as the contact, access, the asbestos register or the comms room, are answered once. They are copied to every room's record, so each space shows the full picture.
- 03
Add a room, then add another
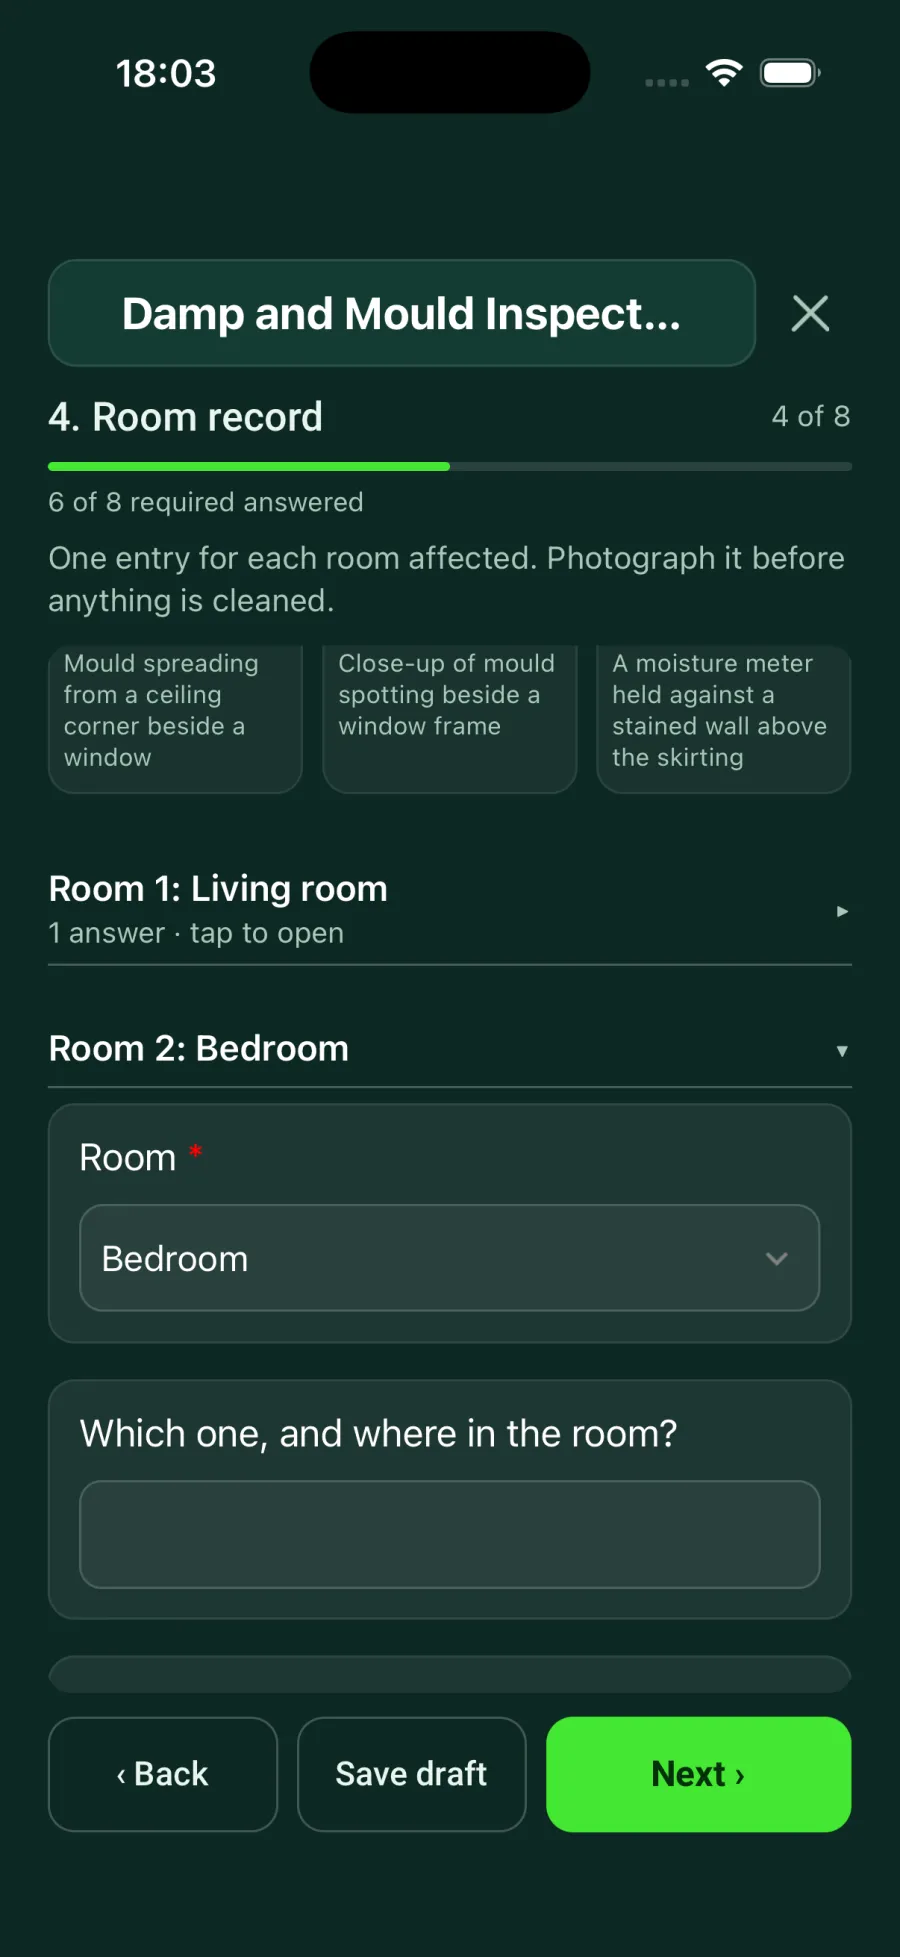
On the rooms page, give the room its name as the site calls it, take the photos and answer the questions. Tap Add another room for the next one; a hundred rooms in one form is fine. Finished rooms fold down to a one-line summary, and you can tap one to reopen it.
- 04
Complete the form and let it sync
On the last page tap Complete. When the phone syncs, SiteSurvey creates a space in the project for every room, or matches a space that already has that name. Rooms with the same name share one space, so keep names distinct.
- 05
Find the rooms under Spaces
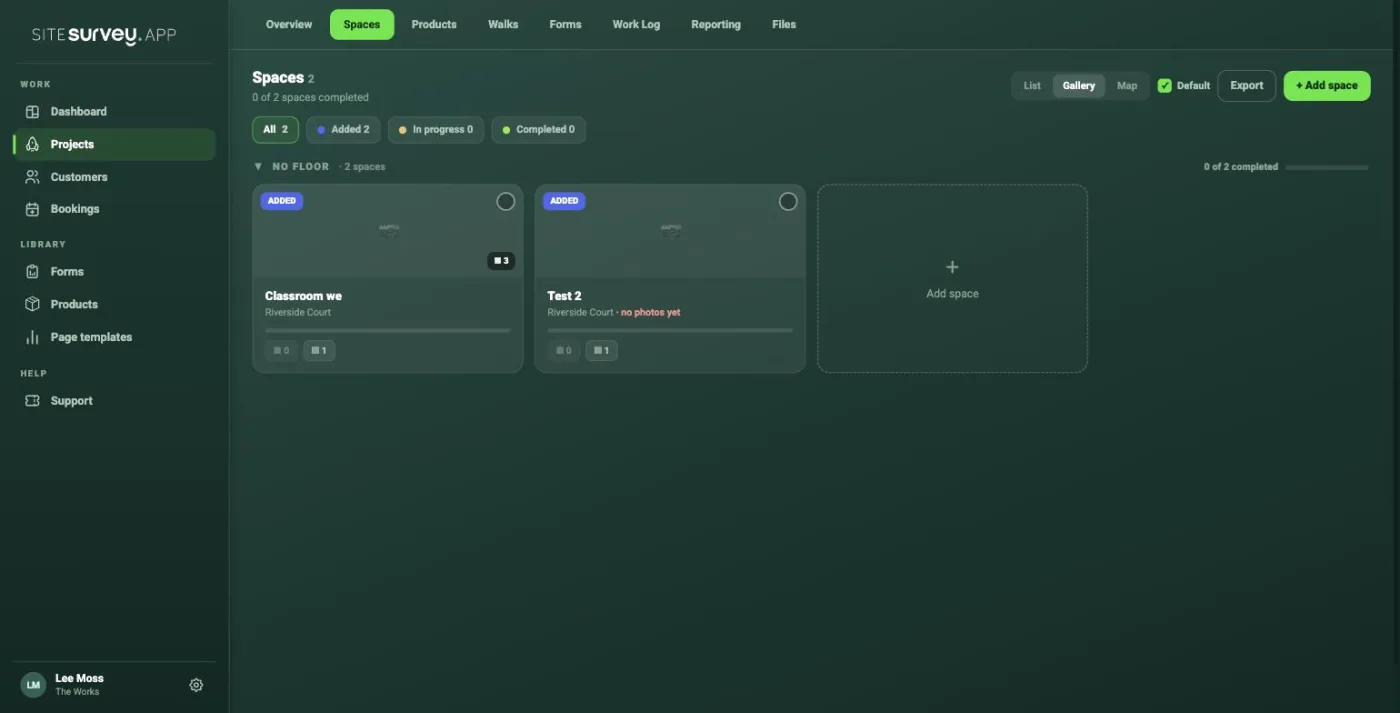
Open the project's Spaces tab. Each room is there as a space with its photo count and its form. The notes you typed for the room become the space description.
- 06
The room's photos sit on the space
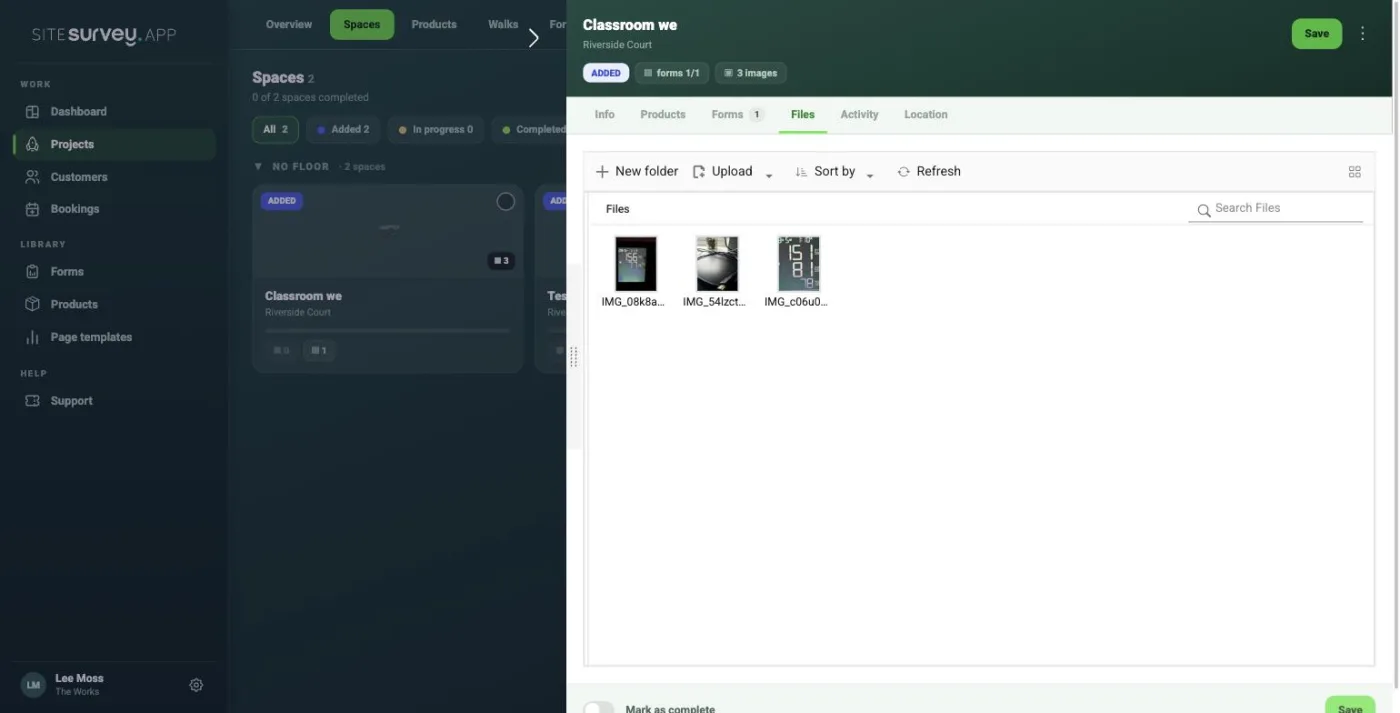
Open a space and go to Files. The photos taken in that room's section of the form are there, and in the space gallery on the phone, exactly as if they had been taken on the space.
- 07
Each space has its own copy of the form
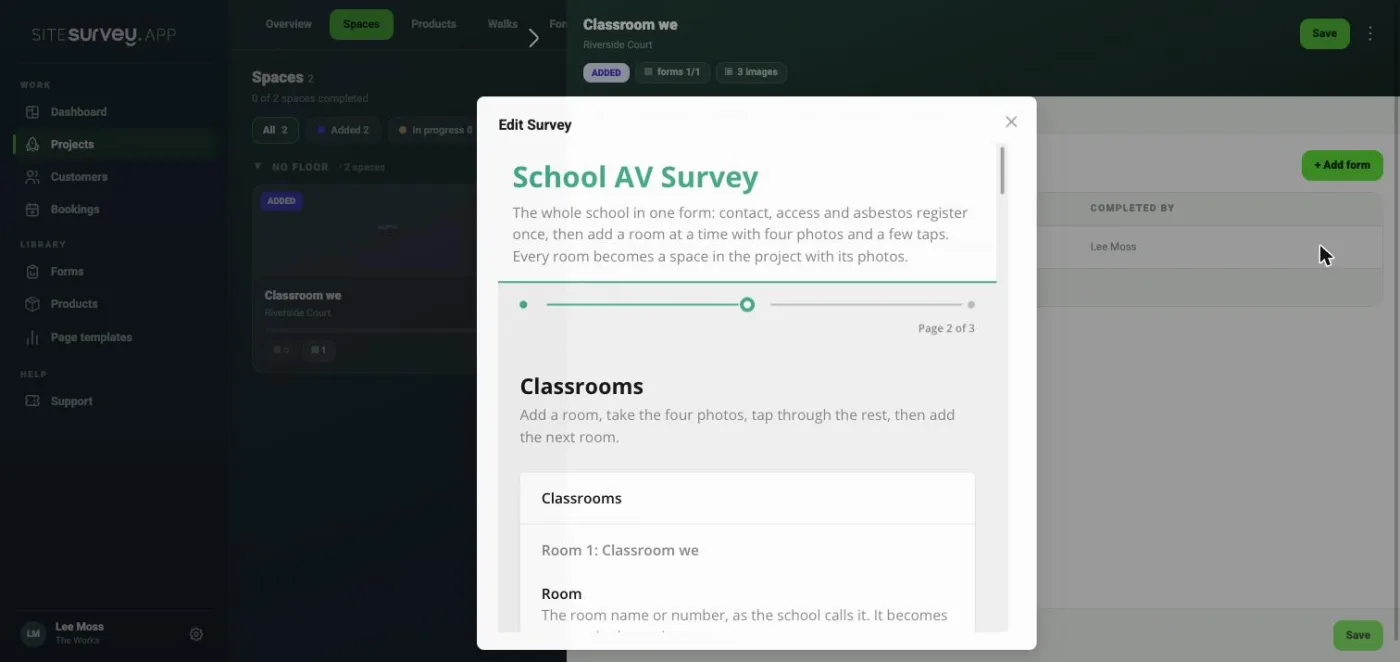
The space's Forms tab holds a copy of the form that shows only that room, plus the shared pages. Open it to check the answers or to build a space report. The full form with every room stays on the project. Make edits on the project's copy: the room copies are rebuilt from it each time it is saved.
- 08
See every room from the project
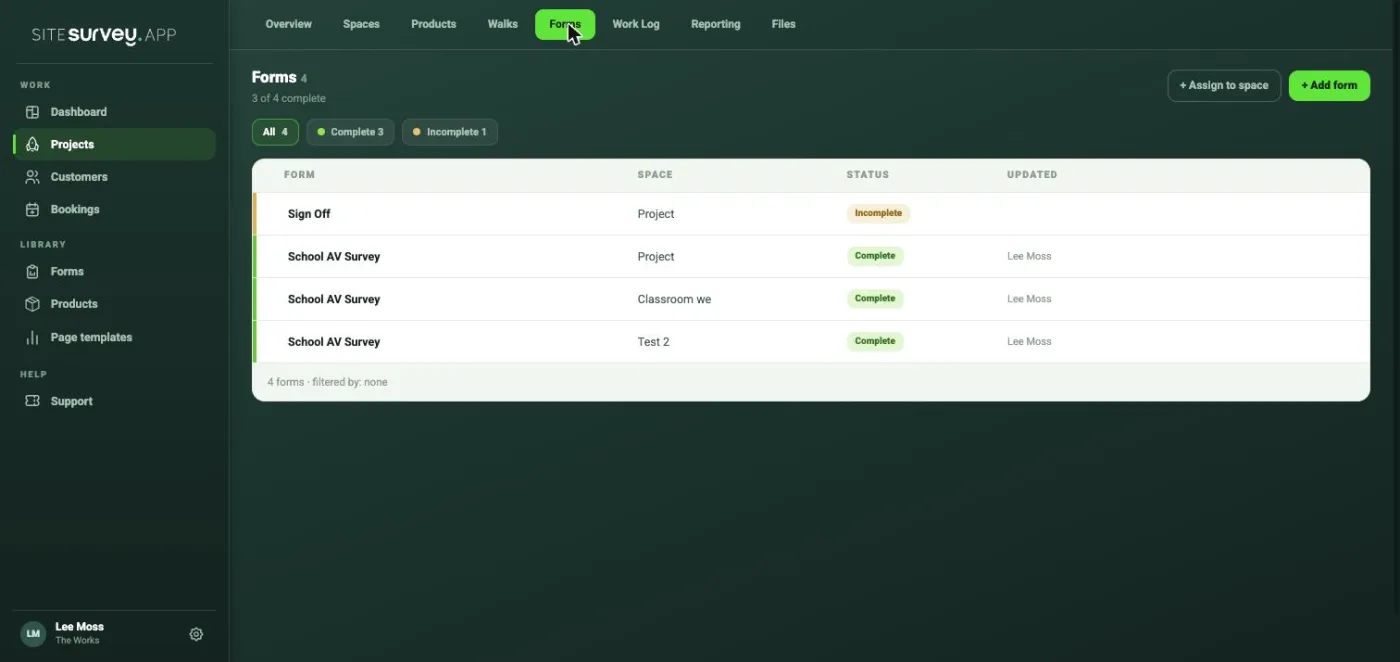
The project's Forms tab lists the full form against Project and one row per room against its space, so you can see at a glance which rooms have been surveyed.
Good to know
- ✓Name rooms the way the site does, for example Room 12 or Year 3 classroom, so the spaces are easy to find and a second visit matches the same spaces.
- ✓If a space with the same name already exists in the project, the form adds to it rather than creating a duplicate.
- ✓Want this on one of your own forms? Add a repeating section for the rooms and ask support to switch on spaces for it.
Was this guide helpful?
Your feedback helps us improve support content.