- 01
Understand what customers can do
A customer user signs in to the web portal with their own account and sees a restricted view built around their organisation, covering projects, the calendar and products. They cannot edit the customer record itself.
- 02
Open the Customer Portal settings
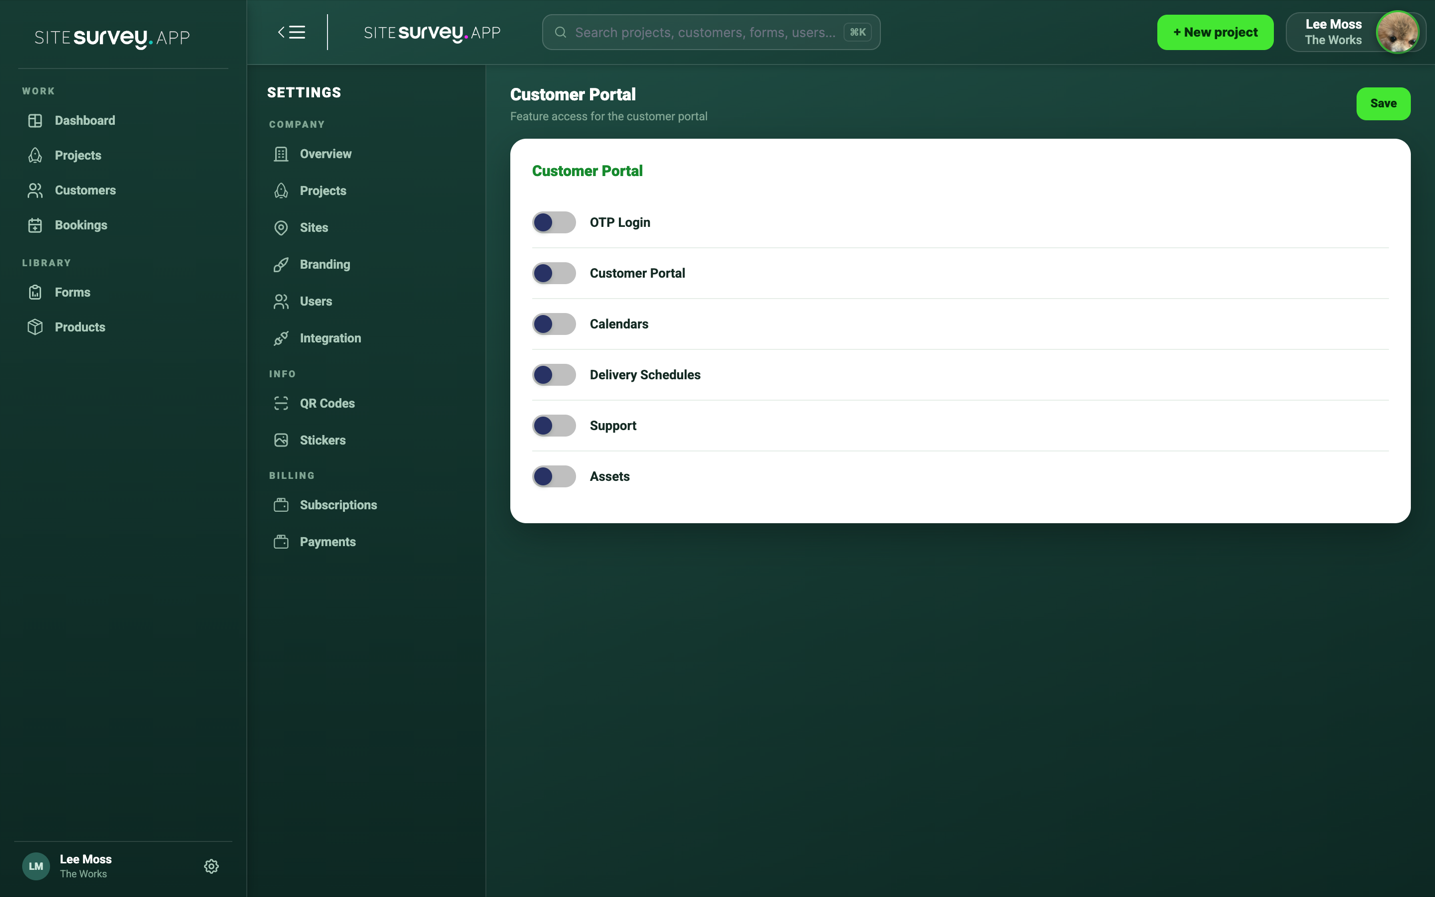
Go to Settings and open Customer Portal. If Customer Portal does not appear in your Settings, the page may not be enabled for your workspace yet — ask SiteSurvey support or your account manager to enable it. The page is labelled Feature access for the customer portal and lists a set of switches.
- 03
Switch on the features customers need
Turn on Customer Portal to enable access, then choose the areas customers can use: Calendars, Delivery Schedules, Support and Assets. Leave anything off that your customers do not need to see.
- 04
Decide on OTP Login
Switch on OTP Login if you want an extra sign-in step. After entering their password, each user is emailed a one-time passcode to complete signing in, on both the web portal and the mobile app.
- 05
Save the settings
Choose Save. The switches apply to the whole workspace, and the page confirms once the customer portal settings have been updated.
- 06
Add users to a customer
Open the customer record and go to its Users tab, then choose Add new user and enter their details. The primary contact is created automatically when the customer is first added, and you can edit or delete customer users from the same tab.
Good to know
- ✓Customers sign in at the same web portal address as your team, using the email address on their customer user record.
- ✓Only enable the feature switches a customer genuinely needs — a smaller portal is easier for them to use.
- ✓Deleting a user from the customer's Users tab ends their portal access.
Was this guide helpful?
Your feedback helps us improve support content.